Tag: diy

  • 5 Easy Steps to Create a Captivating Chinese Lantern

    5 Easy Steps to Create a Captivating Chinese Lantern

    5 Easy Steps to Create a Captivating Chinese Lantern

    Immerse your self within the enchanting artwork of Chinese language lantern making and illuminate your environment with vibrant colours and complex designs. With a fragile stability of custom and creativity, you may rework extraordinary paper into extraordinary lanterns, bringing a contact of the Orient into your house. Whether or not you are a seasoned crafter or simply beginning your inventive journey, this step-by-step information will present all of the instruments and methods it’s essential to create gorgeous Chinese language lanterns that may captivate your senses and ignite your creativeness.

    Start with the important supplies: skinny, translucent paper, equivalent to rice paper or vellum; bamboo or wire frames; scissors; glue; and a choice of colourful threads or ribbons. Rice paper, with its delicate texture and semi-transparent nature, is usually the popular selection for its genuine Chinese language lantern aesthetic. Nonetheless, vellum, with its easy floor and sturdiness, provides a wonderful various for freshmen. As for the frames, bamboo offers a sturdy and light-weight base, whereas wire permits for extra intricate designs and adaptability. After getting gathered your supplies, let the artistic course of unfold and embrace the enjoyment of crafting your personal distinctive Chinese language lantern.

    Subsequent, reduce out the paper into desired sizes and shapes, experimenting with totally different patterns and designs to create a lantern that displays your private fashion. Historically, Chinese language lanterns function geometric shapes, equivalent to circles, squares, and hexagons, however be at liberty to discover natural varieties and complex cutouts. As soon as the paper is reduce, rigorously glue it to the body, guaranteeing that the sides are easy and safe. Depart a small opening on the backside of the lantern for inserting a lightweight supply, equivalent to a small LED candle or a string of fairy lights. Add ending touches by embellishing the lantern with colourful threads, ribbons, or tassels, reworking it right into a vibrant murals. As you full your lantern, take a second to admire the wonder you’ve gotten created, figuring out that you’ve got mastered the traditional artwork of Chinese language lantern making.

    Attaching the Gentle Supply

    After getting assembled the lantern, it is time to add the sunshine supply. This may make your lantern glow fantastically at the hours of darkness.

    Selecting the Proper Gentle Supply

    There are a number of totally different choices for gentle sources that you should utilize in your Chinese language lantern. Listed below are some elements to contemplate when selecting:

    • Brightness: How brilliant would you like your lantern to be? In order for you it to be seen from a distance, you will want a brighter gentle supply.
    • Coloration: What coloration gentle would you like your lantern to emit? You’ll be able to select from a wide range of colours, together with white, yellow, crimson, and blue.
    • Energy supply: How do you wish to energy your gentle supply? You’ll be able to select from battery-operated, solar-powered, or plug-in choices.

    Putting in the Gentle Supply

    As soon as you’ve got chosen a lightweight supply, it is time to set up it in your Chinese language lantern. Listed below are the steps you will must comply with:

    1. Make a gap within the backside of the lantern. The outlet must be massive sufficient to suit the sunshine supply’s twine or wire.
    2. Insert the sunshine supply into the opening. Make it possible for the sunshine supply is going through the right route.
    3. Safe the sunshine supply in place. You should use tape, glue, or a zipper tie to safe the sunshine supply.
    4. Join the sunshine supply to the facility supply. For those who’re utilizing a battery-operated gentle supply, you will must insert the batteries. For those who’re utilizing a solar-powered gentle supply, you will want to position the photo voltaic panel in a sunny location.
    5. Take a look at the sunshine supply. Make it possible for the sunshine supply is working correctly earlier than you shut up the lantern.

    Tips on how to Make a Chinese language Lantern

    Chinese language lanterns, also referred to as kongming lanterns, are stunning and conventional decorations which are usually used to have a good time festivals and holidays. They’re made out of a skinny paper or silk material and are connected to a body made from bamboo or wire. A small candle or gas cell is positioned contained in the lantern, and the warmth from the flame causes the lantern to rise into the air.

    Making a Chinese language lantern is a comparatively straightforward challenge, and it may be a enjoyable and rewarding exercise for individuals of all ages.

    Supplies

    • Skinny paper or silk material
    • Bamboo or wire body
    • Scissors
    • Glue
    • A small candle or gas cell

    Directions

    1. Lower a chunk of paper or material that’s massive sufficient to cowl the body.
    2. Fold the paper or material in half after which in half once more.
    3. Lower out a small gap within the heart of the paper or material.
    4. Glue the paper or material to the body.
    5. Insert a candle or gas cell into the lantern.
    6. Gentle the candle or gas cell and watch the lantern rise into the air.

    Ideas

    • Use a skinny paper or material that’s light-weight and can enable the lantern to rise simply.
    • Be certain that the body is robust sufficient to help the burden of the lantern.
    • Watch out to not place the candle or gas cell too near the paper or material, as this might trigger the lantern to catch hearth.
    • Fly the lantern in a secure space away from bushes, buildings, and different obstacles.

    Individuals Additionally Ask About Tips on how to Make a Chinese language Lantern

    What’s the finest materials to make use of for a Chinese language lantern?

    The very best materials to make use of for a Chinese language lantern is a skinny paper or silk material. These supplies are light-weight and can enable the lantern to rise simply.

    What sort of body ought to I exploit for a Chinese language lantern?

    You should use a bamboo or wire body for a Chinese language lantern. Bamboo is a conventional materials, however wire is a extra sturdy possibility.

    How do I make the lantern rise into the air?

    To make the lantern rise into the air, it’s essential to place a small candle or gas cell contained in the lantern. The warmth from the flame will trigger the lantern to rise.

    Is it secure to fly a Chinese language lantern?

    You will need to fly a Chinese language lantern in a secure space away from bushes, buildings, and different obstacles. You must also watch out to not place the candle or gas cell too near the paper or material, as this might trigger the lantern to catch hearth.

  • 5 Easy Steps to Create a Captivating Chinese Lantern

    5 Easy Steps to Test a Light Switch with a Multimeter

    5 Easy Steps to Create a Captivating Chinese Lantern
    $title$

    Electrical issues might often come up inside your private home, and one frequent subject is a defective mild change. Earlier than changing the change, it is essential to verify that it is certainly the supply of the issue. Utilizing a multimeter, you possibly can conveniently check the sunshine change to find out if it is functioning accurately. This text offers a complete information on the best way to check a light-weight change with a multimeter, guaranteeing security and accuracy in your electrical troubleshooting.

    Firstly, guarantee that you’ve got a multimeter set to the voltage measurement setting. Flip off the ability provide to the sunshine change on the circuit breaker or fuse field earlier than commencing the check. This security precaution prevents any electrical shocks or additional harm to the change or multimeter. As soon as the ability is disconnected, proceed to the subsequent step.

    Subsequent, establish the terminals on the sunshine change. Most mild switches have two terminals, generally labeled as “Line” and “Load.” Join the multimeter’s probes to those terminals. The pink probe ought to be related to the “Line” terminal, and the black probe ought to be related to the “Load” terminal. With the multimeter in place, now you can flip the ability provide again on and observe the multimeter’s readings.

    Inspecting the Gentle Change

    Earlier than utilizing a multimeter to check a light-weight change, it is necessary to visually examine the change and its environment for any apparent indicators of harm or put on. Listed below are some key steps to observe in the course of the inspection:

    • Test the Faceplate: Look at the faceplate of the sunshine change for any cracks, dents, or free screws. Be sure that it is securely hooked up to the wall and that there are not any gaps or holes round its edges.
    • Observe the Toggle/Rocker: If the sunshine change has a toggle or rocker mechanism, transfer it forwards and backwards a number of instances to test for clean operation. Word any stiffness, sticking, or extreme resistance throughout switching.
    • Examine the Terminals: Take away the faceplate to reveal {the electrical} terminals of the sunshine change. Search for any indicators of corrosion, free wires, or burnt insulation. Test if the terminals are tightly secured and that there is not any uncovered copper wire.
    • Look at the Wiring: Hint the wires related to the sunshine change to make sure they are not broken, frayed, or free. Search for any damaged or disconnected wires that would point out a wiring subject.
    • Test for Overheating: Really feel across the mild change and its environment for any noticeable heat or warmth. Extreme warmth is usually a signal of overloading or electrical issues.
    Inspection Level What to Look For
    Faceplate Cracks, dents, free screws
    Toggle/Rocker Stiffness, sticking, extreme resistance
    Terminals Corrosion, free wires, burnt insulation
    Wiring Harm, fraying, free connections
    Overheating Noticeable heat or warmth

    Setting Up Your Multimeter

    Earlier than you start testing a light-weight change, it is important to make sure your multimeter is accurately arrange for the duty. Comply with these steps to organize your multimeter:

    1. Select the suitable setting

    Find the dial or knob on the multimeter labeled “Perform” or “Mode.” Rotate the dial to pick the setting that corresponds to the kind of measurement it’s good to take. For testing a light-weight change, you’ll sometimes use the “Continuity” or “Ohms” setting.

    2. Join the multimeter probes

    The multimeter has two probes: a pink probe and a black probe. Join the pink probe to the “VΩmA” or “Ohm” port on the multimeter. Join the black probe to the “COM” or “Floor” port.

    Multimeter Port Probe Colour
    VΩmA or Ohm Crimson
    COM or Floor Black

    3. Zero the multimeter

    Earlier than taking any measurements, it’s good to zero the multimeter. This ensures that it’s offering correct readings. With the probes disconnected from any circuit, contact the 2 probes collectively. The multimeter show ought to learn “0 ohms” or “0 volts.” If it doesn’t learn “0,” regulate the zeroing knob till it does.

    4. Take a look at the multimeter battery

    It is advisable to test the multimeter battery earlier than use to make sure it isn’t low or useless. Most multimeters have a battery check characteristic; check with the multimeter’s guide for particular directions.

    Testing the Change for Continuity

    Utilizing a multimeter to check a light-weight change for continuity is an easy course of. Here is a step-by-step information that can assist you out:

    • 1. Set the multimeter to the continuity setting.
    • Flip off the ability to the change on the circuit breaker or fuse field.
    • Disconnect the wires from the change.
    • Contact the multimeter probes to the 2 terminals on the change.
    • If the change is closed, you must hear a beeping sound and see a studying of 0 ohms.
    • If the change is open, you’ll not hear a beeping sound, and the show will learn “OL” or “∞”.
    • Here is a desk summarizing the outcomes you may see when testing a light-weight change for continuity:

      Multimeter Studying Change Situation
      0 ohms Change is closed
      “OL” or “∞” Change is open

      If the change doesn’t check for continuity, it’s possible defective and ought to be changed. At all times keep in mind to show off the ability earlier than testing any electrical part.

      Measuring Resistance within the On Place

      Step 4: Use the Multimeter to Test Resistance

      Now, it is time to use the multimeter to test the resistance of the sunshine change. Here is an in depth step-by-step information on the best way to do it:

      1. Set the multimeter to the ohms (Ω) setting. This setting measures resistance.
      2. Contact one multimeter probe to the terminal screw on the facet of the sunshine change the place the ability is available in. That is sometimes the brass-colored screw.
      3. Contact the opposite multimeter probe to the terminal screw on the facet of the sunshine change the place the ability goes out to the sunshine fixture. That is often the silver-colored screw.
      4. Observe the multimeter studying. If the multimeter reads near 0 ohms, it signifies that the change is closed and conducting electrical energy.
      5. If the multimeter reads infinity (∞) ohms, it signifies that the change is open and never conducting electrical energy.

      Here is a desk summarizing the attainable multimeter readings and their corresponding meanings:

      Multimeter Studying That means
      Near 0 ohms Change is closed, conducting electrical energy
      Infinity (∞) ohms Change is open, not conducting electrical energy

      Verifying Voltage Presence

      Earlier than testing the change, confirming the presence of voltage within the circuit is essential for security. Comply with these steps to confirm voltage utilizing a multimeter:

      1. Set Multimeter to AC Voltage Mode

      Change the multimeter to the AC voltage vary appropriate for the circuit’s voltage (often 200V or increased).

      2. Determine the Sizzling and Impartial Wires

      In a typical residential circuit, the black wire is usually scorching (stay), whereas the white wire is impartial. Determine these wires utilizing a non-contact voltage tester or by referring to the circuit diagram.

      3. Set Multimeter Probes

      Join the multimeter probes to the suitable wires. The black (detrimental) probe ought to hook up with the impartial wire, and the pink (constructive) probe ought to hook up with the new wire.

      4. Receive a Voltage Studying

      Place the probes on the uncovered wire connections, guaranteeing good contact. The multimeter ought to show the voltage current within the circuit. If the studying is considerably totally different from the anticipated voltage, there could also be an issue with the circuit.

      5. Security Precautions

      It’s important to take the next security precautions when verifying voltage presence:

      Security Facet Precaution
      Private Safety Put on insulated gloves and security glasses.
      Circuit Isolation Flip off the circuit on the breaker or fuse field earlier than testing.
      Probe Placement Make sure the probes are clear and make good contact with naked wires.
      Voltage Vary Choose an applicable voltage vary to forestall harm to the multimeter.

      Figuring out Widespread Wire Connections

      When testing a light-weight change with a multimeter, it is very important first establish the frequent wire connections. These are the wires which can be at all times related to the change, no matter its place. On a single-pole change, there might be two frequent wires, one related to the road terminal and one related to the load terminal. On a three-way change, there might be three frequent wires, one related to the road terminal, one related to the load terminal, and one related to the traveler terminal.

      The next desk exhibits the frequent wire connections for single-pole and three-way switches:

      Change Kind Widespread Wires
      Single-pole Line terminal, load terminal
      Three-way Line terminal, load terminal, traveler terminal

      After you have recognized the frequent wire connections, you should utilize a multimeter to check the change. To do that, set the multimeter to the ohms setting and join the probes to the 2 frequent wires. If the change is working correctly, the multimeter will learn 0 ohms. If the change will not be working correctly, the multimeter will learn infinity.

      Troubleshooting a Defective Change

      If the multimeter readings point out a fault, the subsequent step is to troubleshoot the defective change. Here is a step-by-step information:

      1. Test the Wiring Connections

      Be sure that all of the wires are securely related to the change. Free connections may cause intermittent or full change failure.

      2. Examine the Change for Harm

      Look at the change for any seen harm, reminiscent of cracks, burns, or free elements. If there may be any harm, change the change instantly.

      3. Clear the Change Contacts

      Use a mushy brush or a cotton swab dipped in isopropyl alcohol to wash the change contacts. Over time, filth and particles can accumulate on the contacts, inflicting poor electrical connections.

      4. Take a look at the Change Between Completely different Terminations

      Utilizing the multimeter, check the change between totally different termination combos. For instance, check between the frequent terminal and the terminal that connects to the ability supply, then check between the frequent terminal and the terminal that connects to the sunshine fixture.

      5. Test the Gentle Fixture

      If the change checks out okay, test the sunshine fixture itself. Be sure that the bulb is working, the fixture is correctly grounded, and the wiring is undamaged.

      6. Change the Change

      If the troubleshooting steps don’t resolve the difficulty, the change is probably going defective and have to be changed. Be sure that the alternative change has the identical specs and amperage score as the unique.

      7. Superior Troubleshooting

      For extra advanced change points, think about the next:

      • Backstabbed Wires: If the wires are related to the change utilizing the backstabbing methodology, take away the wires and join them utilizing screw terminals as a substitute.
      • Dimmers: Dimmers require particular forms of switches. Be sure that the dimmer is appropriate with the change you’re utilizing.
      • Capacitors: Some switches, reminiscent of fluorescent mild switches, use capacitors. Test if the capacitor is defective or wants alternative.
      • Free Parts: Test for free screws, wires, or different elements contained in the change field.

      Security Precautions Whereas Testing

      Earlier than you start testing a light-weight change with a multimeter, it is necessary to take some security precautions. These precautions will assist to forestall accidents and accidents.

      1. Flip off the ability to the sunshine change on the circuit breaker or fuse field.

      2. Put on security glasses and gloves to guard your self from electrical shock and flying particles.

      3. Use a correctly rated multimeter. The multimeter ought to be rated for the voltage of the circuit you’re testing.

      4. Don’t contact the metallic probes of the multimeter together with your naked palms.

      5. Hold the multimeter away from water and different liquids.

      6. Don’t use the multimeter to check circuits which can be stay.

      7. If you’re undecided the best way to use a multimeter, seek the advice of with a certified electrician.

      8. After you have taken the mandatory security precautions, you possibly can start testing the sunshine change.

      To check a light-weight change, observe these steps:

      1. Set the multimeter to the ohms setting.
      2. Contact one probe of the multimeter to the brass screw on the sunshine change.
      3. Contact the opposite probe of the multimeter to the silver screw on the sunshine change.
      4. If the multimeter reads 0 ohms, then the change is closed.
      5. If the multimeter reads infinity ohms, then the change is open.

      If the sunshine change will not be working correctly, it’s possible you’ll want to exchange it. To interchange a light-weight change, observe these steps:

      1. Flip off the ability to the sunshine change on the circuit breaker or fuse field.
      2. Take away the faceplate from the sunshine change.
      3. Unscrew the 2 screws that maintain the sunshine change in place.
      4. Pull the sunshine change out of {the electrical} field.
      5. Disconnect the wires from the sunshine change.
      6. Join the wires to the brand new mild change.
      7. Push the brand new mild change into {the electrical} field.
      8. Screw within the two screws that maintain the sunshine change in place.
      9. Change the faceplate on the sunshine change.
      10. Activate the ability to the sunshine change on the circuit breaker or fuse field.

      How one can Take a look at a Gentle Change with a Multimeter

      To check a light-weight change utilizing a multimeter, observe these steps:

      1. Flip off the ability to the change on the circuit breaker or fuse field.
      2. Take away the faceplate from the change.
      3. Set the multimeter to the ohms setting (Ω).
      4. Contact one probe of the multimeter to one of many terminals on the change.
      5. Contact the opposite probe of the multimeter to the opposite terminal on the change.
      6. If the multimeter reads 0 ohms, the change is closed.
      7. If the multimeter reads infinity (∞), the change is open.
      8. If the multimeter reads something between 0 and infinity, the change is defective.
      9. Repeat steps 4-7 for every terminal on the change.

      Further Ideas for Correct Outcomes

      Listed below are some further ideas for correct outcomes when testing a light-weight change with a multimeter:

      Use a high-quality multimeter.

      A high-quality multimeter will present extra correct readings than an affordable one.

      Ensure that the multimeter is ready to the proper setting.

      The multimeter ought to be set to the ohms setting (Ω) when testing a light-weight change.

      Contact the probes to the proper terminals.

      The probes ought to be touched to the terminals on the change, to not the wires.

      Ensure that the change is within the right place.

      The change ought to be within the “on” place or simply alternating between “on” and “off” when testing it.

      Deciphering Take a look at Outcomes

      Understanding the readings in your multimeter is essential for figuring out the performance of the sunshine change.

      Outcomes and Interpretation:

      Studying Interpretation
      0 Volts (V) Open circuit: The change will not be permitting present to circulate.
      120V Closed circuit: The change is permitting present to circulate.
      Fluctuating Voltage Intermittent connection: The change might have free wiring or contacts.

      Further Data:
      1. For a single-pole mild change, just one wire from the ability supply ought to be related to the change.
      2. For a three-way mild change, two wires from the ability supply ought to be related to the change.
      3. Be sure that the ability is turned off earlier than testing any wiring or electrical elements.
      4. If you’re not sure in regards to the check outcomes or the performance of the sunshine change, search the help of a certified electrician.

      How To Take a look at A Gentle Change With A Multimeter

      A multimeter is a helpful software for testing electrical circuits, together with mild switches. Here is a step-by-step information on the best way to check a light-weight change with a multimeter:

      1. Security First: Flip off the ability to the circuit on the breaker panel earlier than you start testing.
      2. Set the Multimeter: Set your multimeter to the AC voltage setting, sometimes 200V or increased.
      3. Disconnect the Change: Take away the faceplate and disconnect the wires from the change.
      4. Take a look at the Terminals: Contact one multimeter probe to every terminal on the change.
      5. Observe the Studying: If the change is working accurately, you must see a voltage studying when the change is within the "on" place and no voltage when it is within the "off" place.
      6. Take a look at for Continuity: Set your multimeter to the continuity setting. Contact one probe to every terminal on the change. You need to hear a beep or see a studying of 0 ohms when the change is within the "on" place.
      7. Reassemble and Take a look at: As soon as you’ve got confirmed that the change is working, reassemble it and switch the ability again on. Take a look at the change by flipping it on and off to make sure it is working accurately.

      Individuals Additionally Ask

      How have you learnt if a light-weight change is dangerous?

      A nasty mild change might exhibit signs reminiscent of flickering lights, intermittent operation, or a buzzing sound.

      Can you utilize a non-contact voltage tester to check a light-weight change?

      Sure, you should utilize a non-contact voltage tester to test for voltage on the change terminals.

      What’s the distinction between a single-pole and a double-pole mild change?

      A single-pole change controls one circuit, whereas a double-pole change controls two separate circuits.

  • 5 Easy Steps to Create a Captivating Chinese Lantern

    5 Easy Steps to Craft Miniature Gravity Falls Characters

    5 Easy Steps to Create a Captivating Chinese Lantern
    $title$

    With their cute designs and quirky personalities, the characters from the beloved animated collection Gravity Falls have captured the hearts of followers world wide. Now, you’ll be able to convey the magic of Gravity Falls into your crafting initiatives with these easy-to-follow directions on easy methods to make tiny Gravity Falls characters. Whether or not you are a seasoned crafter or a newbie, you will discover this information accessible and fulfilling. So, collect your supplies, unleash your creativity, and let’s dive into the fantastic world of Gravity Falls.

    To start, you will want a couple of fundamental supplies together with polymer clay in varied colours, a craft knife, a rolling pin, and a toothpick or skewer. For the primary character, Dipper Pines, begin by making a small ball of flesh-colored clay. Roll it into an oval form and flatten it barely for the pinnacle. Subsequent, create two smaller balls for the eyes and a skinny strip for the mouth. Connect these items to the pinnacle and use a toothpick to create indentations for the nostrils. For the physique, roll out a small sausage form and connect it to the pinnacle. Add legs and arms by rolling out 4 skinny strips and shaping them appropriately.

    As soon as you’ve got mastered the fundamentals, you’ll be able to experiment with totally different characters and poses. For instance, to create Mabel Pines, merely change the hair colour and add a couple of additional particulars, resembling earrings and a headscarf. To make Grunkle Stan, use a darker shade of pores and skin clay and add a mustache. The probabilities are countless, so let your creativeness run wild and create your individual miniature Gravity Falls world. These tiny characters should not solely enjoyable to make but additionally make fantastic presents for followers of the present. So, seize your polymer clay and begin crafting right this moment!

    Crafting Mini Dipper and Mabel

    Supplies:

    • Polymer clay in pores and skin, brown, black, white, purple, and yellow
    • Toothpicks
    • Small paintbrush
    • Acrylic paint in black, brown, white, and purple
    • Clear gloss varnish
    • Paperclips

    Directions:

    Dipper:

    1. To make Dipper, begin by rolling out a small ball of skin-colored clay
    right into a cone form. This would be the base of his physique.

    2. Subsequent, roll out an extended, skinny coil of brown clay for his hair and
    connect it to the highest of the cone. Use a toothpick to create small indentations
    within the hair to offer it some texture.

    3. For Dipper’s legs and arms, roll out 4 skinny coils of skin-colored clay.
    Connect two to the underside of the physique for the legs and two to the perimeters for
    the arms. Use a toothpick to create fingers and ft by gently urgent
    down on the ends of the coils.

    4. To make Dipper’s hat, roll out a skinny sheet of brown clay and minimize out
    a circle. Fold the circle in half and connect it to Dipper’s head. Use a toothpick
    to create a small brim across the hat.

    5. For the ending touches, paint Dipper’s eyes black, his nostril brown,
    and his mouth purple. You can too add particulars like his birthmark and freckles
    utilizing a small paintbrush.

    Sculpting Soos and Wendy

    To create the characters Soos and Wendy from the TV present Gravity Falls, you will have polymer clay in varied colours, a sculpting device, and a toothpick. Comply with these directions to begin your sculptures.

    Soos

    1. Begin by creating the physique. Roll a big ball of brown clay right into a pear form. Push the slim finish of the pear form to create Soos’s beak-like nostril. Use the sculpting device to carve the main points of his eyes and mouth.
    2. Roll 4 small balls of brown clay for the legs. Flatten the balls and form them into sausage-like kinds. Connect the legs to the physique, two on either side.
    3. Create the arms by rolling two extra giant balls of brown clay. Form the balls into barely curved sausage kinds. Connect the arms to the perimeters of the physique.
    4. For the hat, roll out a skinny sheet of black clay. Minimize a circle the scale of Soos’s head and one other circle barely smaller. Connect the smaller circle to the middle of the bigger circle to create the brim. Place the hat on Soos’s head.

    Wendy

    1. Create the physique by rolling a big ball of peach clay right into a teardrop form. Use the sculpting device to carve the main points of her eyes, mouth, and nostril.
    2. Roll two small balls of peach clay for the arms. Form the balls into barely curved sausage kinds. Connect the arms to the perimeters of the physique.
    3. For the legs, roll two lengthy, skinny sausages of peach clay. Bend the sausages within the center to create the knees. Connect the legs to the underside of the physique.
    4. Create the hair by rolling out a skinny sheet of brown clay. Minimize a circle the scale of Wendy’s head and connect it to the highest of her head. Form the clay right into a ponytail or create a bun.
    5. For the garments, roll out a skinny sheet of blue clay. Minimize out a shirt form and connect it to Wendy’s physique. Minimize out a pair of pants from inexperienced clay and connect them to her legs.

    Shaping Stan and Ford

    To create the enduring twins, Stan and Ford, begin by forming the physique. Roll out a small piece of black clay into a skinny, elongated form for the physique. Create a smaller piece of grey clay and kind it right into a teardrop form for the pinnacle. Connect the pinnacle to the physique with a small quantity of water.

    For Stan’s fez, mildew a small piece of purple clay right into a fez form. Add a skinny strip of black clay across the brim. For Ford’s hat, create an oblong form from darkish inexperienced clay. Add a flat, round piece of white clay to the highest because the brim. Connect each hats to the heads with water.

    Creating Particulars and Persona

    Carry these characters to life by meticulously crafting their distinct options. For Stan, use a toothpick to create small indentations for his eyes and mouth. Add a tiny piece of white clay to his left eye for a attribute wink. Subsequent, form two small items of grey clay into his mustache and eyebrows and connect them with water.

    For Ford, create small indentations for his eyes and add a tiny piece of white clay to his proper eye as properly. Give him a small nostril and a barely furrowed forehead utilizing grey clay. To finish Ford’s look, form a brown beard and connect it to his face with water.

    Stan’s Options Ford’s Options
    Winking left eye Piercing proper eye
    Grey mustache and eyebrows Small nostril and furrowed forehead
    Brown beard

    Constructing the Thriller Shack

    The Thriller Shack is a vital location in Gravity Falls, and constructing a miniature model can add to the enjoyable. This is easy methods to do it:

    Supplies:

    • Cardboard
    • Craft knife
    • Ruler
    • Glue
    • Paint
    • Toothpicks or skewers
    • Optionally available: small decorations

    Steps:

    1. Craft the Shack’s Partitions:

    Minimize out two rectangular items of cardboard to kind the shack’s back and front panels. Minimize out one other two trapezoidal items for the perimeters, making certain a 90-degree angle on the high the place the roof will join. Glue the aspect panels to the back and front panels.

    2. Create the Roof:

    Minimize out a triangular piece of cardboard for the roof. Mark the middle level on the base, which can align with the ridge of the partitions. Glue the roof piece to the highest of the partitions, making certain the ridge is equidistant from the back and front.

    3. Improve with Particulars:

    Use toothpicks or skewers to connect ornamental accents to the outside of the shack. This might embody home windows, a door with a tiny deal with, or perhaps a weathervane on the roof. Paint the shack in its iconic brown and yellow colour scheme.

    4. Create a Rotating Signal:

    Minimize out a small rectangular piece of cardboard and write “Thriller Shack” on it. Connect the signal to a toothpick or skewer and insert it right into a gap poked within the entrance panel close to the roof. Use a small piece of tape to safe the toothpick, permitting the signal to rotate when gently pushed.

    Miniaturizing Invoice Cipher

    Invoice Cipher is a robust demon with a particular look, making it difficult to recreate in miniature kind. Listed below are some tips about easy methods to seize his essence whereas scaling him down:

    1. Base Determine: Begin with a small, spherical base determine for Invoice’s physique. This might be a picket bead or a clean pebble.

    2. Triangle Head: Create a miniature model of Invoice’s iconic triangle head utilizing yellow clay or felt. Use a pointy object to attract the black strains and pupil.

    3. Tuxedo and Bow Tie: Wrap the bottom determine with black cloth to create Invoice’s tuxedo. Add a small purple bow tie to finish the outfit.

    4. Arms and Fingers: Form two small yellow rectangles for Invoice’s arms. Connect them to the physique with a small quantity of glue. Then, create miniature black fingers with white gloves.

    5. Wings and Eyes: Invoice’s wings and eyes are key options that make him recognizable. To create the wings, use black felt or cloth and minimize out two small triangles. For the eyes, paint two small black circles onto yellow dots and connect them to the pinnacle.

    Materials Technique
    Yellow clay or felt Form right into a triangle for the pinnacle
    Black cloth Wrap across the physique for the tuxedo
    Black felt or cloth Minimize out two small triangles for the wings
    Yellow dots and black paint Paint small black circles onto yellow dots for the eyes

    Crafting Gnome Chompsky

    Gnome Chompsky is a minuscule but memorable character from the beloved animated collection Gravity Falls. To seize his peculiar attraction in miniature, observe these meticulous steps:

    1. Collect Your Supplies:

    Merchandise
    Polymer clay (purple, brown, black, white)
    Sculpting instruments (toothpick, needle, wire)
    Clear glaze
    Small paintbrush
    Endurance (optionally available)

    2. Type the Physique:

    Roll a small ball of purple clay for the physique. Use your sculpting instruments to form it right into a squat, barely curved kind.

    3. Create the Head:

    Roll a smaller ball of purple clay for the pinnacle. Use a needle or toothpick to indent the eyes and mouth, and a wire to create the antenna.

    4. Connect the Components:

    Rigorously connect the pinnacle to the physique utilizing a dab of water or glue. Easy out any seams.

    5. Element the Options:

    Add small dots of brown clay for the eyes and pupils, and a skinny strip of black clay for the mustache. Use white clay to focus on the tooth and claws.

    6. Add the Ending Touches:

    Bake the figurine based on the polymer clay producer’s directions. As soon as cooled, apply a transparent glaze to seal and defend the floor. Use a small paintbrush to color the eyes with black acrylic paint, and the mustache with reddish-brown.

    With every meticulous step, your miniature Gnome Chompsky will come to life, embodying the whimsical essence of Gravity Falls within the palm of your hand.

    Creating Tad Unusual

    1. Head

    Begin with a small ball of clay. Roll it into an oval form and flatten the highest barely. Use a small device to poke two small holes for the eyes and a barely bigger gap for the mouth.

    2. Physique

    Roll out a bit of clay into a skinny, rectangular form. Wrap it across the head, making a small physique. Use a small device to create a small indentation for the neck.

    3. Arms

    Roll out two small items of clay into skinny, snake-like shapes. Bend them on the elbows and connect them to the physique.

    4. Legs

    Roll out two extra small items of clay into skinny, snake-like shapes. Bend them on the knees and connect them to the physique. Use a small device to create small indentions for the ft.

    5. Hair

    Roll out a small piece of clay into a skinny, flat form. Minimize out a small, triangular-shaped piece for the bangs and connect it to the highest of the pinnacle. Use a small device to create small holes for the sideburns.

    6. Eyes

    Roll out two tiny balls of white clay and insert them into the holes for the eyes. Use a small device to create tiny black pupils.

    7. Particulars

    Use a small device to create small indentions for the nostrils, eyebrows, and chin. Use a toothpick to create small strains for the wrinkles on the brow. Minimize out a small piece of purple clay for the tongue and insert it into the mouth.

    Materials Amount
    Clay 1 small ball
    Toothpicks 1
    Small device (e.g., sculpting needle) 1
    Water (optionally available) Small quantity

    Modeling Pacifica Northwest

    Pacifica is a blonde, blue-eyed lady with a wealthy and privileged upbringing. She is usually seen sporting designer garments and equipment, and he or she has a snobby and condescending angle. To mannequin Pacifica, you will have:

    1. Blonde yarn
    2. Blue felt
    3. Pink felt
    4. White felt
    5. Black felt
    6. Brown felt
    7. Yellow felt
    8. Orange felt
    9. Purple felt
    10. Inexperienced felt
    11. Purple felt
    12. Gold felt
    13. Silver felt
    14. White glue
    15. Scissors

    Physique:

    To make Pacifica’s physique, begin by chopping out an oval form from yellow felt. This would be the base of the physique. Subsequent, minimize out a smaller oval form from orange felt and glue it to the middle of the yellow oval. This would be the torso. Then, minimize out two small circles from pink felt and glue them to the torso for the arms. Lastly, minimize out two small rectangles from white felt and glue them to the torso for the legs.

    Head:

    To make Pacifica’s head, begin by chopping out a circle from white felt. This would be the base of the pinnacle. Subsequent, minimize out a smaller circle from blonde yarn and glue it to the middle of the white circle. This would be the hair. Then, minimize out two small circles from blue felt and glue them to the pinnacle for the eyes. Lastly, minimize out a small triangle from black felt and glue it to the pinnacle for the nostril. Minimize out a small line from purple felt to be the mouth.

    Garments:

    To make Pacifica’s garments, you will have to chop out the next items from the suitable colours of felt:

    Piece Coloration
    Skirt Pink
    Shirt White
    Jacket Blue
    Scarf Inexperienced
    Headband Gold

    Upon getting minimize out the entire items, you’ll be able to glue them collectively to assemble Pacifica’s garments.

    Sculpting Robbie Valentino

    To sculpt Robbie Valentino, begin by shaping a small ball of clay for his head. Then, create a smaller ball for his neck and connect it to the pinnacle. Form two skinny rolls of clay for his arms and connect them to his shoulders. Type two tiny balls for his fingers and connect them to the tip of his arms.

    For Robbie’s legs, create two skinny rolls of clay and connect them to his hips. Form two tiny balls for his ft and connect them to the tip of his legs. Create a small piece of clay for his nostril and connect it to his face. Add two small balls of clay for his eyes and a skinny strip of clay for his mouth.

    To create Robbie’s hair, form a small ball of clay and flatten it into a skinny disc. Connect the disc to the highest of his head and gently clean out the sides. Lastly, add small particulars resembling his eyebrows, pupils, and freckles to finish the sculpture.

    Ideas for Sculpting Robbie Valentino

    * Use a toothpick or small sculpting device to create particulars resembling his eyebrows, pupils, and freckles.
    * If the clay turns into too dry, add a small quantity of water and knead it till it turns into pliable once more.
    * Enable the sculpture to dry fully earlier than portray it.
    * Use quite a lot of colours to color Robbie’s garments and equipment.

    Materials Amount
    Clay Small quantity
    Toothpick or small sculpting device Optionally available
    Paint As wanted

    Assembling the Total Forged

    10. Dipper Pines

    Dipper is a 12-year-old boy who’s curious, adventurous, and at all times searching for a thriller to unravel. He’s the primary character of the present and is usually seen sporting a blue cap with a pine tree on it.

    To make Dipper, you will have:

    • A yellow pipe cleaner
    • A blue pipe cleaner
    • A black pipe cleaner
    • A purple pipe cleaner
    • A small piece of paper
    • A pair of scissors

    Directions:

    1. Take the yellow pipe cleaner and bend it in half.
    2. Take the blue pipe cleaner and wrap it across the high of the yellow pipe cleaner, forming a hat.
    3. Take the black pipe cleaner and minimize it into two items. Use one piece to kind Dipper’s hair and the opposite piece to kind his eyebrows.
    4. Take the purple pipe cleaner and minimize it right into a small piece. Use this piece to kind Dipper’s nostril.
    5. Draw Dipper’s eyes on the small piece of paper and glue it to the highest of the yellow pipe cleaner.
    6. Assemble the items to kind Dipper.

    Easy methods to Make Tiny Gravity Falls Characters

    With a little bit creativity and a few fundamental supplies, you’ll be able to simply create your individual tiny Gravity Falls characters. This is how:

    1. Collect your supplies. You’ll need:
      • Polymer clay in varied colours
      • Modeling instruments
      • Toothpicks or skewers
      • Baking sheet
      • Parchment paper
    2. Select a personality to make. Begin with a easy character like Dipper or Mabel. When you get the hold of it, you’ll be able to attempt making extra complicated characters.
    3. Roll out the polymer clay. Roll out a skinny sheet of clay within the base colour of your character. Minimize out the fundamental form of the character’s physique.
    4. Add particulars. Use modeling instruments so as to add particulars to the character’s physique, resembling eyes, nostril, mouth, hair, and garments.
    5. Bake the character. Preheat your oven to the temperature really helpful by the clay producer. Place the character on a baking sheet lined with parchment paper and bake for the really helpful time.
    6. Cool the character. As soon as the character is baked, let it cool fully earlier than dealing with it.

    Folks Additionally Ask

    How massive ought to the characters be?

    The dimensions of your characters is as much as you. Nevertheless, if you wish to make characters which can be proportional to the characters within the present, you need to intention for a peak of about 1 inch.

    What sort of clay ought to I exploit?

    There are a lot of various kinds of polymer clay obtainable. For newbies, I like to recommend utilizing a delicate, easy-to-work-with clay resembling Sculpey III or Fimo.

    How can I make the characters get up?

    To make your characters get up, you need to use a toothpick or skewer to insert into the underside of their ft. You possibly can then bend the toothpick or skewer to create a stand.

  • 5 Easy Steps to Create a Captivating Chinese Lantern

    7 Easy Steps on How to Hang a Headboard on Your Wall

    5 Easy Steps to Create a Captivating Chinese Lantern
    How hang headboard on wall

    Remodeling your bed room décor with a trendy headboard is a unbelievable solution to elevate its aesthetic attraction. Whether or not you are in search of an opulent velvet design or a minimalist picket one, hanging a headboard on the wall can immediately create a focus and improve the room’s ambiance. The method of mounting a headboard is comparatively easy and may be achieved with a number of easy instruments. Nevertheless, guaranteeing a safe and aesthetically pleasing set up requires cautious planning and a focus to element. On this complete information, we are going to present step-by-step directions on methods to cling a headboard on the wall, guaranteeing a seamless and professional-looking end.

    Earlier than embarking on the set up course of, it is important to assemble the mandatory instruments and supplies. You’ll require a drill, stage, measuring tape, pencil, screws, anchors (if wanted), and a stud finder (elective however extremely really helpful). After you have assembled all of the required objects, the subsequent step is to find out the best placement of the headboard. Measure the width of the headboard and use a pencil to mark the middle level on the wall the place it will likely be hung. Utilizing a stage, draw a horizontal line on the desired top for the headboard, usually the highest of the mattress or barely above it.

    If the wall is manufactured from drywall, you need to use anchors to make sure a safe maintain for the screws. Insert the anchors into the pre-drilled holes and faucet them flush with the wall utilizing a hammer. Subsequent, align the headboard with the marked line on the wall and elevate it into place. Utilizing a drill, drive screws via the designated holes within the headboard and into the anchors or studs. Be certain that the screws are tightened securely, however keep away from overtightening, as this could injury the headboard or wall. As soon as all of the screws are in place, step again and admire your newly put in headboard, which is able to now function a surprising point of interest in your bed room.

    How you can Hold a Headboard on the Wall

    Hanging a headboard on the wall is an effective way so as to add fashion and persona to your bed room. It is also a comparatively simple mission that may be accomplished in a number of hours.

    Listed below are the steps on methods to cling a headboard on the wall:

    1. Collect your supplies. You have to a headboard, a drill, a stage, a tape measure, and screws or nails.
    2. Measure and mark the situation of the headboard on the wall. Use a stage to make it possible for the headboard is hung evenly.
    3. Drill pilot holes into the wall. These holes will assist to stop the screws or nails from splitting the wooden.
    4. Drive the screws or nails into the wall. You should definitely use screws or nails which might be lengthy sufficient to carry the headboard securely.
    5. Hold the headboard on the wall. Make it possible for the headboard is stage and safe.

    Individuals Additionally Ask About How you can Hold a Headboard on the Wall

    How do you cling a headboard with out drilling into the wall?

    There are a number of methods to hold a headboard with out drilling into the wall. A technique is to make use of adhesive strips. One other means is to make use of Command hooks. You too can use a headboard bracket that attaches to the mattress body.

    How excessive must you cling a headboard?

    The peak of your headboard will depend upon the scale of your mattress and the peak of your ceiling. rule of thumb is to hold the headboard in order that the highest of the headboard is about 6 inches above the highest of the mattress.

    Are you able to cling a headboard on drywall?

    Sure, you possibly can cling a headboard on drywall. Nevertheless, you will want to make use of screws or nails which might be lengthy sufficient to achieve the studs behind the drywall.

  • 5 Easy Steps to Create a Captivating Chinese Lantern

    4 Simple Steps to Change Oil in a Honda Lawn Mower

    5 Easy Steps to Create a Captivating Chinese Lantern

    Lawn Mower Oil Change

    Sustaining your Honda garden mower is important for making certain its longevity and optimum efficiency. A vital side of correct upkeep is altering the oil commonly. Recent oil helps lubricate shifting components, lowering friction and stopping untimely put on. It additionally removes contaminants and particles that may accumulate over time, which might have an effect on the mower’s effectivity and lifespan.

    Altering the oil in a Honda garden mower is a simple activity that may be simply completed with a number of easy instruments and slightly mechanical data. Security ought to all the time be a precedence when working with equipment, so all the time put on acceptable gloves and security glasses. Earlier than starting the oil change, make sure the mower is turned off and disconnected from the spark plug to stop unintended beginning. Moreover, permit the engine to chill down earlier than continuing, as scorching oil may cause burns.

    Finding the Oil Drain Plug and Oil Filter

    To find the oil drain plug and oil filter, observe these steps:

    1. Park the garden mower on a stage floor and switch off the engine.

    2. Find the oil drain plug beneath the engine. It’s sometimes a bolt with a washer and situated on the underside of the engine’s oil pan.

    3. Find the oil filter. On most Honda garden mowers, the oil filter is situated on the aspect of the engine, close to the highest. It’s sometimes a cylindrical-shaped element with a black cap.

    Oil Drain Plug Location Oil Filter Location
    On the underside of the engine’s oil pan On the aspect of the engine, close to the highest

    Extra ideas for finding the oil drain plug and oil filter:

    • Consult with your garden mower’s proprietor’s guide for particular directions on finding the oil drain plug and oil filter.
    • Use a flashlight to light up the underside of the garden mower if crucial.
    • When you have issue finding the oil drain plug or oil filter, contact a professional mechanic for help.

    Draining the Outdated Oil

    Earlier than you start the oil change course of, make sure that the lawnmower is on a stage floor and permit the engine to chill down fully. Security must be your high precedence, so put on acceptable security gear, comparable to gloves and security glasses.

    Find the oil drain plug, which is usually discovered on the decrease a part of the engine. Place an oil drain pan beneath the plug to catch the used oil. Use a wrench to rigorously loosen the oil drain plug, taking care to not overtighten it. Enable the oil to empty fully into the oil drain pan. This may increasingly take a couple of minutes, relying on the quantity of oil within the engine.

    Whereas the oil is draining, take a second to wash any particles or filth across the oil drain plug space. It will assist stop contamination of the brand new oil.

    As soon as the oil has completed draining, change the oil drain plug and tighten it securely with the wrench. Be cautious to not overtighten, as this may harm the threads on the plug or the engine case. Consult with the desk under for the beneficial tightening torque to your Honda garden mower mannequin:

    Honda Garden Mower Mannequin Oil Drain Plug Tightening Torque
    GXV160 14-18 ft-lbs
    GXV140 12-15 ft-lbs

    Checking the Oil Stage

    1. Park your Honda garden mower on a stage floor.
    2. Wait a couple of minutes for the engine to chill down.
    3. Take away the oil dipstick, which is normally situated close to the highest of the engine.
    4. Wipe the dipstick clear with a rag.
    5. Reinsert the dipstick into the engine and pull it out once more.
    6. Verify the oil stage on the dipstick. The oil must be between the “full” and “low” marks on the dipstick.
    7. If the oil stage is low, add extra oil by way of the oil filler cap. Use the kind of oil beneficial by Honda to your garden mower engine.

    Beginning the Engine

    8. Ensure that the oil stage is right.
    9. Join the spark plug wire to the spark plug.
    10. Activate the gas valve.
    11. Set the choke to the “on” place.
    12. Pull the starter wire.
    13. As soon as the engine begins, let it run for a couple of minutes to heat up.
    14. Flip off the choke.
    15. Mow your garden!

    Supplies Wanted

    – New oil (confer with your proprietor’s guide for the beneficial sort and quantity)

    – New oil filter (if relevant)

    – Funnel

    – Wrenches

    – Oil drain pan

    – Rags or paper towels

    Step-by-Step Directions

    1. Security First

    Make sure the mower is parked on a stage floor, the engine is off, and the spark plug wire is disconnected.

    2. Find the Oil Drain Plug

    Sometimes discovered on the underside of the engine.

    3. Place the Oil Drain Pan

    Place the pan below the oil drain plug to catch the used oil.

    4. Drain the Oil

    Use a wrench to loosen the oil drain plug and permit the oil to empty fully.

    5. Substitute the Oil Drain Plug

    After all of the oil has drained, tighten the oil drain plug again in place.

    6. Find the Oil Filter (If Relevant)

    In case your mower has an oil filter, find it and take away it utilizing an oil filter wrench.

    7. Set up the New Oil Filter (If Relevant)

    Apply a small quantity of recent oil to the gasket of the brand new oil filter and screw it on by hand till comfortable. Don’t overtighten.

    8. Add New Oil

    Use a funnel to pour the beneficial quantity of recent oil into the engine. Verify the oil stage commonly as you add oil.

    9. Verify the Oil Stage

    Oil Stage Verify Process:
    – Begin the engine and let it run for a couple of minutes.
    – Cease the engine and wait a couple of minutes for the oil to settle.
    – Take away the dipstick, wipe it clear, and reinsert it.
    – Take away the dipstick once more and test the oil stage. It must be between the “min” and “max” marks on the dipstick.

    10. Clear Up

    Get rid of the used oil and filter correctly. Wipe up any spills and wash your palms.

    The right way to Change Oil for a Honda Garden Mower

    Altering the oil in your Honda garden mower is a comparatively easy activity that may be accomplished in a matter of minutes. By following these steps, you’ll be able to preserve your mower operating easily and lengthen its lifespan.

    **Supplies you will have:**
    – New oil (test your proprietor’s guide for the beneficial sort and quantity)
    – Oil filter (if outfitted)
    – Funnel
    – Drain pan
    – Rags or paper towels

    **Step 1:** Park the mower on a stage floor and have interaction the parking brake. Enable the engine to chill for no less than half-hour earlier than starting.

    **Step 2:** Find the oil drain plug on the underside of the engine. Place the drain pan beneath the plug and take away the plug utilizing a wrench or socket.

    **Step 3:** Enable the oil to empty fully into the pan. This may increasingly take a number of minutes.

    **Step 4:** As soon as the oil has drained, change the drain plug and tighten it securely.

    **Step 5:** In case your mower has an oil filter, take away the previous filter and change it with a brand new one. Hand-tighten the brand new filter till it’s comfortable, then use a wrench to tighten it an extra 1/4 to 1/2 flip.

    **Step 6:** Use a funnel so as to add new oil to the mower. Add the quantity of oil laid out in your proprietor’s guide. Verify the oil stage utilizing the dipstick and add extra oil as wanted.

    **Step 7:** Begin the mower and let it run for a couple of minutes. Verify for leaks and make sure that the oil stage continues to be throughout the beneficial vary.

    Folks Additionally Ask About The right way to Change Oil for a Honda Garden Mower

    How usually ought to I alter the oil in my Honda garden mower?

    You must change the oil in your Honda garden mower each 25 hours of operation or as soon as per season, whichever comes first.

    What sort of oil ought to I exploit in my Honda garden mower?

    Consult with your proprietor’s guide for the beneficial sort and quantity of oil to your particular mower mannequin.

    Can I alter the oil in my Honda garden mower with out an oil filter?

    Some Honda garden mower fashions wouldn’t have oil filters. In case your mannequin doesn’t have an oil filter, merely observe the steps above to alter the oil.

    What are the indicators that my Honda garden mower wants an oil change?

    Indicators that your Honda garden mower wants an oil change embody issue beginning, extreme smoking, and a drop in efficiency.

  • 5 Easy Steps to Create a Captivating Chinese Lantern

    10 Simple Steps To Replace Glass Window Double Pane

    5 Easy Steps to Create a Captivating Chinese Lantern

    The article consists of at the least 3 paragraphs. Sentences comprise transition phrases. Each paragraphs will need to have a minimal 250 phrases. Paragraphs should use

    tags. and fix one featured picture $title$

    Owners are liable for sustaining their property, together with making repairs as wanted. One frequent restore is changing a damaged window pane. In case you have a double-pane window, you could be questioning for those who can exchange simply the glass. The reply is sure, you possibly can exchange the glass in a double-pane window with out changing the complete window. This can be a comparatively easy restore that the majority householders can do themselves.

    First, you’ll need to take away the previous glass. To do that, you’ll need to rigorously pry the glazing strips away from the body. As soon as the glazing strips are eliminated, it is possible for you to to carry the previous glass out of the body. You’ll want to put on gloves when dealing with the glass, as it may be sharp.

    Subsequent, you’ll need to wash the body and apply a brand new bead of silicone caulk. As soon as the caulk has dried, you possibly can set up the brand new glass. To do that, merely place the brand new glass within the body and press it into place. You’ll want to easy out the caulk across the edges of the glass. As soon as the caulk has dried, your window will likely be repaired.

    How To Exchange Glass Window Double Pane

    Changing a double pane glass window generally is a daunting job, however it’s truly fairly easy with the correct instruments and supplies. Listed below are the steps on the right way to exchange glass window double pane:

    1. Take away the previous glass. Use a putty knife to rigorously pry the previous glass out of the body. Watch out to not harm the body or the brand new glass.
    2. Clear the body. Use a material to wipe away any grime or particles from the body. This can assist to make sure that the brand new glass will match correctly.
    3. Apply a bead of silicone caulk across the perimeter of the body. This can assist to seal the brand new glass in place and stop leaks.
    4. Fastidiously place the brand new glass into the body. Press the glass firmly into place and be sure that it’s degree.
    5. Safe the glass with glazing factors. Glazing factors are small metallic clips that maintain the glass in place. Use a glazing level driver to insert the glazing factors into the body.
    6. Apply a bead of silicone caulk across the perimeter of the glass. This can assist to seal the glass in place and stop leaks.
    7. Enable the caulk to dry fully. This can usually take 24 hours.

    Individuals Additionally Ask About How To Exchange Glass Window Double Pane

    What’s the price to switch a double pane window?

    The fee to switch a double pane window will fluctuate relying on the dimensions of the window, the kind of glass, and the labor prices in your space. Nevertheless, you possibly can anticipate to pay between $200 and $600 per window.

    How lengthy does it take to switch a double pane window?

    Changing a double pane window will usually take between 1 and a pair of hours. Nevertheless, this time might fluctuate relying on the dimensions of the window and the complexity of the set up.

    Can I exchange a double pane window myself?

    Sure, you possibly can exchange a double pane window your self. Nevertheless, it is very important have the correct instruments and supplies and to comply with the directions rigorously. In case you are not comfy changing the window your self, you possibly can rent knowledgeable to do it for you.

  • 5 Easy Steps to Create a Captivating Chinese Lantern

    4 Easy Steps to Install Floor Molding

    5 Easy Steps to Create a Captivating Chinese Lantern

    Remodel the aesthetics of your property and defend your flooring with the elegant contact of flooring molding. Its versatility extends to varied flooring varieties, from hardwood to laminate and past, providing a simple but impactful improve to any room. By following our step-by-step information, you’ll be able to seamlessly set up flooring molding, including a contact of sophistication and safeguarding your flooring for years to return. Embark on this easy mission and witness the transformative energy of flooring molding, enhancing the attraction and performance of your residing areas.

    Earlier than embarking on the set up course of, collect the important instruments and supplies: a miter noticed, measuring tape, degree, caulk gun, and adhesive or nails. Select flooring molding that enhances the color and style of your flooring. After you have the whole lot prepared, it is time to put together the floor. Guarantee the ground and partitions are clear, dry, and freed from particles. If obligatory, fill any gaps or holes with caulk or wooden filler. Measure and mark the size of the molding wanted for every wall and minimize the items utilizing a miter noticed for exact 45-degree angles. The corners would require particular consideration; make certain the miters match collectively completely for a seamless end.

    Apply a beneficiant bead of adhesive or insert nails alongside the again of the molding. Fastidiously place the molding towards the wall, making certain it aligns together with your markings. Use a degree to test the straightness and modify the molding as wanted. Press firmly alongside your entire size to make sure a safe bond. As soon as the molding is in place, apply caulk to fill any gaps between the molding and the ground or wall. For an expert end, use a humid material to clean out the caulk and take away any extra. Permit the caulk to dry fully earlier than having fun with your newly remodeled residing area with trendy and guarded flooring.

    Planning the Set up

    Earlier than embarking on the set up of flooring molding, meticulous planning is paramount. This meticulous course of consists of the exact measurement of the molding in addition to the correct preparation of the set up space and the number of acceptable adhesives. To make sure a seamless set up, correct measurements of the size and width of the molding are important. Cautious consideration should even be paid to the angles and miters required for every part of the molding to suit snugly round corners and transitions.

    Along with measuring and deciding on the molding, the preparation of the set up floor is equally necessary. This preparation usually includes cleansing the floor to take away any particles or contaminants which will intervene with the adhesive bond. Moreover, making certain the floor is degree and free from any irregularities will contribute to an expert and aesthetically pleasing set up. Addressing any uneven areas or fixing any imperfections previous to set up will improve the general high quality of the completed product.

    Required Instruments and Supplies

    For a profitable flooring molding set up, the next instruments and supplies are indispensable:

    Software/Materials Description
    Measuring tape Correct measurement of molding size and width
    Miter noticed Exact chopping of angles and miters
    Nail gun Securing molding to the floor
    Adhesive Further reinforcement of molding attachment

    Selecting the Proper Molding

    Deciding on the suitable flooring molding is essential for each aesthetic and useful causes. Listed below are some key components to contemplate when choosing the proper molding:

    Materials:

    The fabric used for flooring molding primarily determines its sturdiness, lifespan, and look. Frequent supplies embrace wooden, plastic, composite, and metallic. Wooden, recognized for its basic magnificence and heat, gives sturdiness and will be stained or painted to match the flooring.

    Plastic and composite moldings are cost-effective, moisture-resistant, and straightforward to put in. Nevertheless, they might not have the identical aesthetic attraction or longevity as wooden. Metallic moldings, significantly aluminum and stainless-steel, present distinctive sturdiness and a contemporary, industrial look.

    Dimension and Profile:

    The scale and profile of the molding influence the general visible impact and performance. Wider moldings, usually utilized in bigger rooms, create a extra substantial base for the flooring, whereas narrower moldings are appropriate for smaller areas or areas the place a refined transition is desired.

    The profile refers back to the cross-sectional form of the molding. Select a profile that enhances the flooring and architectural type of the room. Frequent profiles embrace base, quarter-round, shoe, and cove.

    Shade and End:

    The colour and end of the molding ought to harmonize with the ground and decor. Darker moldings can add a way of sophistication, whereas lighter shades create a extra ethereal and spacious really feel. Take into account the kind of flooring end, reminiscent of hardwood, laminate, or tile, when deciding on the molding shade.

    Along with these components, the supposed use of the room and the general design aesthetic must also be thought of when selecting flooring molding.

    Materials Professionals Cons
    Wooden Sturdiness, magnificence, versatility Price, moisture susceptibility
    Plastic Affordability, moisture resistance Sturdiness, aesthetic attraction
    Composite Sturdiness, low upkeep Look, value in comparison with wooden
    Metallic Sturdiness, trendy look Price, set up complexity

    Getting ready the Flooring

    Earlier than putting in flooring molding, it is important to arrange the ground correctly. This is an in depth information:

    1. Take away Baseboards and Trim

    Utilizing a pry bar, rigorously take away the prevailing baseboards and every other trim items across the perimeter of the room. Be light to keep away from damaging the partitions or flooring.

    2. Clear the Subfloor

    Sweep or vacuum the subfloor totally to take away any filth, particles, or nails. Use a humid mop to wipe up any remaining mud or spills.

    3. Examine and Restore the Subfloor

    Fastidiously examine the subfloor for any harm, reminiscent of cracks, holes, or free boards. If obligatory, restore any broken areas utilizing acceptable supplies (e.g., wooden filler, screws, or nails). Make sure that the subfloor is degree and freed from any imperfections.

    Frequent Subfloor Defects Restore Strategies
    Cracks Fill with wooden filler or caulk; anchor with screws if obligatory
    Holes Patch with a bit of plywood or wooden; safe with nails or screws
    Free Boards Safe with extra nails or screws; substitute if severely broken
    Uneven Floor Degree with self-leveling compound or shims; substitute total subfloor in excessive circumstances

    As soon as the subfloor is clear and repaired, it is prepared for the set up of flooring molding.

    Putting in the Molding

    1. Measure and Minimize the Molding: Decide the size of the molding wanted and minimize it utilizing a miter noticed or miter field to create angled ends.

    2. Apply Adhesive and Nails: Apply a skinny layer of wooden glue or development adhesive to the again of the molding. Safe the molding in place utilizing nails or a brad nailer spaced 12-16 inches aside.

    3. Conceal the Nails: Sink the nails barely under the floor of the molding utilizing a nail set. Fill the holes with wooden filler or caulk to hide them.

    4. Miter Corners: When putting in molding round corners, minimize the ends at a 45-degree angle. Apply adhesive and nails as described above, making certain the mitered corners meet snugly.

    5. Superior Methods for Difficult Installations:

    Problem Resolution
    Uneven Partitions Use shims or a degree to make sure the molding is plumb
    Spherical or Angled Partitions Create customized templates or use versatile molding to evolve to the form
    Molding that Bends or Curves Steam or warmth the molding to govern it into the specified form
    Molding with Intricate Particulars Use specialised instruments, reminiscent of a coping noticed, to rigorously create advanced cuts

    Mitering the Corners

    Mitering the corners requires a exact minimize to make sure a seamless match. This is a step-by-step information with extra particulars for a clear mitered nook:

    1. Mark the Intersecting Traces: Use a miter field or a protractor to mark the intersecting traces on each items of molding at a 45-degree angle.
    2. Clamp the Molding: Safe the molding items in a miter field or use a miter clamp to carry them firmly in place.
    3. Set the Noticed: Regulate the miter noticed to a 45-degree angle for a single minimize or a 22.5-degree angle for a double minimize (two 45-degree angles stacked collectively).
    4. Observe Cuts: Earlier than chopping the precise molding, make some follow cuts on scrap items to fine-tune the angle and depth.
    5. Minimize the Molding: Fastidiously minimize by the molding items following the marked traces whereas holding the noticed firmly towards the miter field or clamp.
    6. Examine the Match: Dry match the mitered items collectively by inserting them on the ground or wall nook. Examine for any gaps or overlaps and modify the cuts as obligatory.
    7. Sand and Prep the Corners: Use fine-grit sandpaper or a sanding device to clean any tough edges or imperfections on the mitered joints.
    8. Apply Adhesive and Set up: Apply a skinny layer of adhesive to the mitered corners and press them firmly into place. Safe with nails or wooden screws as wanted.

    Further Suggestions for Mitering Corners:

    Tip Goal
    Use a pointy noticed blade Prevents tear-out and ensures clear cuts
    Clamp the molding securely Eliminates motion throughout chopping and ensures accuracy
    Minimize with a lightweight contact Prevents chipping or breaking the molding
    Sand the miters dry Supplies a smoother end and higher adhesion
    Dampen the molding earlier than mitering Makes it extra pliable and simpler to chop

    Making use of the End

    After you’ve gotten put in the ground molding, you have to apply a end to guard it and provides it a refined look. There are a number of various kinds of finishes that you should utilize, together with paint, stain, and polish. The kind of end you select will rely on the kind of molding you’ve gotten put in and the look you need to obtain.

    To use a end to flooring molding, comply with these steps:

    1. Clear the molding with a humid material to take away any mud or filth.
    2. Apply a skinny coat of end to the molding utilizing a brush or a sponge.
    3. Permit the primary coat to dry fully earlier than making use of a second coat.
    4. Sand the molding calmly with fine-grit sandpaper to clean the end.
    5. Apply a 3rd coat of end to the molding.

    Here’s a desk summarizing the various kinds of finishes that you should utilize for flooring molding:

    Sort of End Description
    Paint Paint is an efficient choice for flooring molding as a result of it’s sturdy and straightforward to use. You may select from all kinds of colours and finishes to match your décor.
    Stain Stain is an efficient choice for flooring molding if you wish to spotlight the pure grain of the wooden. Stain is out there in quite a lot of colours, so you will discover a shade that matches your décor.
    Varnish Varnish is an efficient choice for flooring molding if you wish to defend it from put on and tear. Varnish is out there in quite a lot of finishes, together with gloss, semi-gloss, and matte.

    Suggestions for a Profitable Set up

    1. Select the Proper Molding

    Take into account the type of your room, the kind of flooring, and the specified transition between the ground and wall.

    2. Measure and Minimize the Molding

    Measure the size of the wall and minimize the molding to suit utilizing a miter noticed or a handsaw.

    3. Put together the Wall

    Clear the wall and take away any filth or particles. If obligatory, apply a skinny layer of adhesive caulk to the again of the molding.

    4. Set up the Molding

    Place the molding towards the wall and press it firmly into place. Use a nail gun or hammer and nails to safe it.

    5. Set the Nails

    Countersink the nails barely under the floor of the molding utilizing a nail set.

    6. Fill the Nail Holes

    Apply wooden filler to the nail holes and permit it to dry. Sand the floor clean.

    7. Paint or Stain the Molding (Non-obligatory)

    If desired, paint or stain the molding to match the wall or flooring.

    Superior Suggestions

    8. Use a Backer Rod

    Apply a backer rod between the molding and the wall to forestall drafts and air leakage.

    9. Safe the Molding with Screws

    For a stronger maintain, use screws as an alternative of nails to safe the molding.

    10. Create a Customized Edge

    For a extra ornamental contact, minimize a customized edge on the molding utilizing a router or a hand noticed.

    How you can Set up Flooring Molding

    Flooring molding is an ornamental trim that covers the hole between your flooring and the wall. It helps to hide any unevenness or gaps, and it might probably additionally add a contact of favor to your room. Putting in flooring molding is a comparatively straightforward mission that may be accomplished in a number of hours.

    To put in flooring molding, you’ll need the next supplies:

    • Flooring molding
    • Miter noticed
    • Caulk gun
    • Caulk
    • Hammer
    • Nails
    • Degree
    • Measuring tape

    After you have gathered your supplies, you’ll be able to start the set up course of.

    1. Measure and minimize the ground molding to the specified size. Use a miter noticed to create a 45-degree angle on every finish of the molding. This can permit the molding to suit snugly towards the wall and the ground.
    2. Apply a bead of caulk to the again of the molding. This can assist to seal any gaps and forestall moisture from getting beneath the molding.
    3. Nail the molding into place. Use a hammer and nails to safe the molding to the wall and the ground. Make it possible for the molding is degree and that it’s flush with the wall and the ground.
    4. Caulk any gaps between the molding and the wall or flooring. This can assist to create a seamless end.

    After you have put in the ground molding, you’ll be able to get pleasure from the brand new look of your room. Flooring molding is an easy and cheap means so as to add a contact of favor to your property.

    Folks Additionally Ask

    How do you narrow flooring molding round corners?

    To chop flooring molding round corners, you’ll need to make use of a miter noticed. First, measure the size of the molding that you just want for all sides of the nook. Then, mark the molding on the desired size. Use the miter noticed to chop a 45-degree angle on every finish of the molding. This can permit the molding to suit snugly towards the wall and the ground.

    What sort of nails do you have to use to put in flooring molding?

    It is best to use 18-gauge end nails to put in flooring molding. These nails are small and skinny, so they won’t break up the molding. They’re additionally sturdy sufficient to carry the molding in place securely.

    How do you caulk flooring molding?

    To caulk flooring molding, you’ll need to use a bead of caulk to the again of the molding. This can assist to seal any gaps and forestall moisture from getting beneath the molding. Use a caulk gun to use the caulk. Maintain the caulk gun at a 45-degree angle and apply a steady bead of caulk to the again of the molding.

  • 5 Easy Steps to Create a Captivating Chinese Lantern

    6 Easy Steps to Craft a Captivating Fascinator

    5 Easy Steps to Create a Captivating Chinese Lantern

    Summon your interior fashionista and embark on a sartorial journey as we delve into the enchanting world of fascinators. These charming headpieces, adorned with feathers, flowers, and elaborations, possess an attract that elevates any ensemble. Whether or not you are a seasoned milliner or a novice wanting to unleash your creativity, making a fascinator is an artwork kind that may remodel your private type.

    The journey begins with a stable basis. Select a light-weight base that may comfortably perch upon your head, comparable to sinamay or buckram. Wire frames can present extra assist, permitting you to form and mould the fascinator to your required silhouette. After getting your base, it is time to let your creativeness soar. Feathers, of their vibrant hues and delicate textures, are traditional additions to fascinators. Prepare them strategically to create a sleek cascade or a playful burst of coloration.

    Flowers, each actual and synthetic, convey a contact of nature’s class to fascinators. Safe them with millinery wire, making certain they keep firmly in place. Gildings comparable to beads, sequins, or ribbons can add a contact of sparkle and class. The important thing to making a charming fascinator lies in balancing these parts harmoniously, making certain that every element enhances the others. With endurance, inspiration, and a eager eye for element, you may craft a fascinator that may flip heads and ignite conversations.

    Selecting the Proper Supplies

    Making a fascinator requires a cautious collection of supplies to make sure each aesthetics and sturdiness. Here is a complete information to the necessities you will want:

    Base Supplies

    The selection of base materials will decide the form and construction of your fascinator. Take into account the next choices:

    Materials Traits
    Buckram Stiff and moldable, best for creating elaborate, sculpted designs
    Felt Delicate and pliable, appropriate for creating flat and curved shapes
    Wire mesh Light-weight and versatile, good for creating delicate and ethereal designs
    Silk Luxurious and stylish, will be draped or gathered for a classy look
    Straw Pure and breathable, provides texture and character

    Gildings

    To boost the design of your fascinator, you will want quite a lot of elaborations. These can embody:

    Embellishment Goal
    Feathers Provides quantity and drama
    Beads Gives sparkle and texture
    Ribbon Creates a fragile and female contact
    Buttons Provides a playful or elegant factor
    Lace Provides intricate particulars and a contact of romance

    Different Necessities

    Along with the primary supplies, you will additionally want the next:

    • Millinery wire (for shaping and attaching elaborations)
    • Material glue (for securing elaborations)
    • Scissors
    • Measuring tape or ruler
    • Pins (for holding supplies in place)
    • Headband or clip (for attaching the fascinator to your head)

    Deciding on a Base

    A very powerful factor of a fascinator is its base, because it determines the dimensions, form, and construction of the piece. Listed below are just a few components to contemplate when choosing a base:

    Materials

    Fascinator bases are available a variety of supplies, together with buckram (a stiffened cloth), felt, wire, and lace. Buckram is a flexible possibility that may be molded into numerous shapes, whereas felt gives a delicate and textured base. Wire gives a versatile and light-weight possibility, appropriate for extra elaborate designs. Lace provides a fragile and complicated contact, excellent for particular events.

    Measurement and Form

    The scale and form of the bottom will rely upon the specified dimension and magnificence of the fascinator. Frequent shapes embody circles, squares, ovals, and teardrops. Take into account the proportion and stability of the bottom in relation to the opposite parts of the fascinator, such because the feathers and elaborations.

    Building

    The development of the bottom can be necessary to contemplate. Some bases have a single layer, whereas others could also be constructed with a number of layers for added stability and dimension. The best way the bottom is hooked up to the scarf or hair clip additionally impacts the general wearability and luxury of the fascinator.

    Creating the Fascinator Wireframe

    The wireframe is the inspiration of your fascinator, offering the construction and form that may assist the material and elaborations. Begin by gathering the next supplies:

    • Floral wire
    • Wire cutters
    • Needle-nose pliers

    Selecting the Wire

    The kind of wire you select will depend on the dimensions and complexity of your fascinator. For small, delicate designs, use wire with a gauge of 26 or 28. For bigger, extra elaborate fascinators, use a heavier wire, comparable to 22 or 24 gauge.

    Shaping the Wireframe

    Begin by forming a primary form in your wireframe, comparable to a circle, oval, or teardrop. Bend the wire into the specified form utilizing your fingers or needle-nose pliers. Safe the wire ends along with a small piece of wire twisted round them.

    Including Dimension and Particulars

    To create a extra fascinating and dynamic wireframe, add extra items of wire to create curves, loops, or spirals. Reduce items of wire to the specified lengths and use needle-nose pliers to form and safe them to the bottom wireframe. You can too experiment with totally different wrapping methods, comparable to coiling or twisting, so as to add texture and visible curiosity to your wireframe.

    Wire Gauge Measurement Complexity
    26-28 Small, delicate Easy
    22-24 Giant, elaborate Advanced

    Attaching Feathers and Different Gildings

    After getting a primary fascinator form, you can begin so as to add elaborations to make it your personal. Feathers are a preferred selection for fascinators, however you can even use beads, sequins, flowers, or the rest you may consider. Listed below are just a few ideas for attaching feathers and different elaborations to your fascinator:

    4. Attaching Curled Feathers

    To connect curled feathers, you will have:

    • Feathers
    • Glue gun
    • Scissors

    1. Begin by curling the feathers. You are able to do this by rolling them round a pencil or a chopstick.
    2. As soon as the feathers are curled, lower them to the specified size.
    3. Apply a small quantity of scorching glue to the bottom of a feather.
    4. Press the feather onto the fascinator.
    5. Maintain the feather in place for just a few seconds to permit the glue to dry.
    6. Repeat steps 3-5 till all the feathers are hooked up.

    Suggestions for Attaching Curled Feathers

    Listed below are just a few ideas for attaching curled feathers:

    1. Use quite a lot of feather shapes and sizes to create a extra fascinating look.
    2. Experiment with alternative ways of attaching the feathers, comparable to overlapping them, gluing them in a row, or making a fan form.
    3. Add different elaborations, comparable to beads or sequins, to enhance the feathers.

    Securing the Fascinator to a Headband or Clip

    As soon as your fascinator base is full, it is time to connect it to a scarf or clip for safe put on. Listed below are just a few strategies to select from:

    Attaching to a Headband

    Supplies You may Want:
    – Headband with out elaborations
    – Scorching glue gun and glue sticks
    – Material glue
    – Ribbon or cloth scraps (optionally available)

    Steps:
    1. Place a beneficiant quantity of scorching glue onto the middle of the scarf and press the fascinator base firmly onto it.
    2. Maintain in place for 30 seconds to make sure the glue units securely.
    3. For added energy, apply cloth glue alongside the sides of the bottom and clean down any protruding cloth.
    4. If desired, wrap ribbon or cloth scraps across the headband and glue them in place to hide the be a part of.
    5. Superior Tip: For a professional-looking end, use a millinery wire to safe the bottom to the scarf. Bend the wire right into a “U” form and wrap it across the fascinator base. Then, slide the ends of the wire by way of holes punched within the headband and twist them collectively to create a safe maintain.

    Attaching to a Clip

    Supplies You may Want:
    – Alligator clip or comb clip
    – Scorching glue gun and glue sticks
    – Felt or skinny cloth scraps

    Steps:
    1. Reduce a bit of felt or cloth to a dimension barely bigger than the bottom of the clip.
    2. Apply scorching glue to the middle of the felt and press the fascinator base onto it.
    3. Scorching glue the felt onto the clip, masking any uncovered metallic.
    4. Clean down any cloth edges and permit the glue to dry utterly.
    5. Security Observe: Be sure the clip is securely hooked up to the felt to stop any unfastened components from falling off throughout put on.

    Including Ending Touches

    After getting the bottom of your fascinator full, it is time to add the ending touches that may make it actually distinctive. Listed below are some concepts to get you began:

    Connect Feathers

    Feathers are a traditional addition to fascinators, and they are often present in all kinds of colours and sizes. To connect feathers, merely use a small quantity of scorching glue to safe the bottom of the feather to the fascinator. You can too use feathers to create extra elaborate designs, comparable to plumes or sprays.

    Add Beads

    Beads are one other good way so as to add some sparkle and glamour to your fascinator. You need to use beads to create quite a lot of designs, comparable to patterns, borders, or perhaps a entire design. To connect beads, merely use a small quantity of scorching glue to safe them to the fascinator.

    Add Sequins

    Hand-Sew Sequins Many milliners favor this conventional approach, because it permits for extra precision and management over the location of every sequin. At hand-sew sequins, use a needle and thread to rigorously sew every sequin onto the fascinator.
    Glue-On Sequins This methodology is faster and fewer time-consuming than hand-sewing, but it surely would not permit for as a lot precision. To connect on sequins, merely apply a small dot of scorching glue to the again of every sequin and press it onto the fascinator.
    Embellish with Different Supplies Along with feathers, beads, and sequins, you can even use quite a lot of different supplies to decorate your fascinator, comparable to ribbon, lace, and even cloth scraps. The chances are infinite, so get artistic and experiment with totally different supplies to search out the proper search for your fascinator.

    Customizing Your Fascinator

    After getting mastered the essential steps of making a fascinator, you can begin to customise it to your liking. Listed below are some concepts for including your personal private contact:

    7. Gildings

    Gildings can add a contact of sparkle or class to your fascinator. Some standard choices embody:

    Embellishment Description
    Beads Can be utilized to create quite a lot of shapes and designs.
    Sequins Shimmering discs that may add a contact of glamour.
    Rhinestones Crystals that may add a contact of sparkle.
    Feathers Can be utilized to create a dramatic or whimsical look.
    Lace Can be utilized to create a fragile or female look.

    Supplies

    To create a fascinator, you will have the next supplies:

    • Material (comparable to felt, silk, or straw)
    • Wire (comparable to floral wire or millinery wire)
    • Glue (comparable to cloth glue or scorching glue)
    • Scissors
    • Needle and thread (optionally available)
    • Feathers, beads, or different elaborations (optionally available)

      Troubleshooting Frequent Challenges

      The fascinator is just too heavy.

      If the fascinator is just too heavy, will probably be troublesome to put on and will trigger discomfort. To make the fascinator lighter, use lighter supplies, comparable to silk or straw, and keep away from utilizing heavy elaborations. You can too use a smaller base for the fascinator.

      The fascinator is just too flimsy.

      If the fascinator is just too flimsy, it is not going to maintain its form and will collapse. To make the fascinator sturdier, use stiffer supplies, comparable to felt orbuckram, and use extra wire to assist the construction. You can too add a lining to the fascinator to present it extra physique.

      The fascinator just isn’t symmetrical.

      If the fascinator just isn’t symmetrical, it is not going to look balanced and could also be troublesome to put on. To make the fascinator symmetrical, rigorously measure and lower the material and wire earlier than assembling it. You can too use a template that can assist you create a symmetrical form.

      The fascinator just isn’t safe.

      If the fascinator just isn’t safe, it could fall off your head. To make the fascinator safer, use a scarf or comb to connect it to your hair. You can too use bobby pins to safe the fascinator in place.

      The material is fraying.

      If the material is fraying, it can look untidy and will come aside. To forestall the material from fraying, use a material sealant or fray test alongside the sides. You can too use a stitching machine to complete the sides of the material.

      The wire is poking by way of the material.

      If the wire is poking by way of the material, will probably be uncomfortable to put on and will harm the material. To forestall the wire from poking by way of, use a heavier cloth or add a lining to the fascinator. You can too use a wire cutter to trim the surplus wire.

      The glue just isn’t holding.

      If the glue just isn’t holding, the fascinator might come aside. To make sure that the glue holds, use a robust cloth glue or scorching glue. You can too use a clamp or weight to carry the items collectively whereas the glue dries.

      The elaborations are falling off.

      If the elaborations are falling off, they might be hooked up with the incorrect kind of glue. To make sure that the elaborations keep hooked up, use a robust cloth glue or scorching glue. You can too use a needle and thread to stitch the elaborations in place.

      Displaying Your Fascinator

      To show your fascinator with poise and attract, take into account the next steering:

      1. Placement on the Head

      Place the fascinator securely on one facet of the top, barely above the attention.

      2. Angle of Tilt

      Tilt the fascinator barely ahead in direction of the forehead, including a contact of intrigue.

      3. Balancing Parts

      Counterbalance the fascinator’s weight with different equipment, comparable to earrings or a necklace, on the alternative facet.

      4. Hair Issues

      Model hair to enhance the fascinator, whether or not it is a sublime bun, stylish ponytail, or cascading curls.

      5. Headwear Customization

      Decorate the fascinator with ribbons, feathers, or jewels to personalize it and match your outfit.

      6. Correct Storage

      Retailer the fascinator in a breathable bag or field to protect its delicate supplies.

      7. Care and Upkeep

      Deal with the fascinator gently and keep away from exposing it to extreme warmth or moisture.

      8. Versatility of Model

      Discover alternative ways to type your fascinator, from playful to stylish, to match your outfit and event.

      9. Finishing the Look

      Decorate with complementary gloves, clutch bag, or jewellery to create a cohesive and polished ensemble.

      Accent Impact
      Gloves Provides class and class
      Clutch bag Enhances the outfit and gives practicality
      Jewellery Enhances the general glamour and attracts consideration to the fascinator

      Sustaining Your Fascinator

      To make sure that your fascinator stays in pristine situation, it’s essential to observe these upkeep tips:

      1. Cleansing

      – Use a delicate, damp material to softly wipe away any mud or particles.
      – For cussed stains, use a light cleaning soap resolution and a cotton swab to dab it away.
      – Keep away from utilizing harsh chemical compounds or detergents, as they will harm the supplies.

      2. Storage

      – Retailer your fascinator in a cool, dry place away from direct daylight.
      – Use a storage field or bag to guard it from mud and moisture.
      – Don’t stack or crush your fascinator, as this will harm its form.

      3. Dealing with

      – Deal with your fascinator with care, avoiding pointless strain or bending.
      – Use a hair clip or headband to safe it to your head, relatively than pinning it immediately into the material.

      How one can Create a Fascinator

      A fascinator is a small, ornamental headpiece that’s usually worn to formal occasions. It may be constructed from quite a lot of supplies, together with feathers, cloth, and beads. Whereas fascinators will be bought in shops, they will also be made at dwelling with just a few easy supplies.

      To make a fascinator, you will have:

      • A base materials, comparable to felt, buckram, or cardboard
      • Material or different elaborations
      • Adhesive
      • A scarf or clip

      After getting gathered your supplies, you may start to create your fascinator.

      Begin by reducing out a base form in your fascinator. The form will be easy, comparable to a circle or sq., or it may be extra elaborate, comparable to a flower or chook. After getting lower out the bottom form, you may start so as to add elaborations.

      Gildings will be something from feathers to beads to cloth scraps. You may glue the elaborations on to the bottom form, or you should use wire or thread to connect them. Be artistic and experiment with totally different combos of supplies to create a fascinator that’s distinctive and trendy.

      As soon as you might be glad together with your fascinator, you may connect it to a scarf or clip. This may help you put on your fascinator securely and comfortably.

      Individuals Additionally Ask

      What’s a fascinator?

      A fascinator is a small, ornamental headpiece that’s usually worn to formal occasions.

      How do you make a fascinator?

      To make a fascinator, you will have a base materials, cloth or different elaborations, adhesive, and a scarf or clip. Begin by reducing out a base form in your fascinator. Then, add elaborations to the bottom form utilizing glue, wire, or thread. Lastly, connect your fascinator to a scarf or clip.

      What supplies can I exploit to make a fascinator?

      You need to use quite a lot of supplies to make a fascinator, together with felt, buckram, cardboard, cloth, feathers, beads, and wire.

  • 5 Effective Methods: How to Remove Rust from Your Bike

    5 Effective Methods: How to Remove Rust from Your Bike

    Ways to remove rust from bike

    How To Remove Rust From Bike

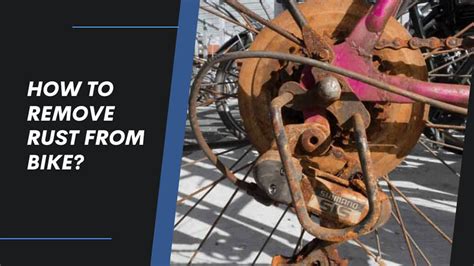
    Rust is the results of iron oxidizing when uncovered to oxygen and moisture. It may be a serious downside for bike house owners, as it may possibly rapidly unfold and harm the body, parts, and different components of the bike. Should you’re coping with rust in your bike, there are some things you are able to do to take away it and forestall additional harm.

    One of the vital efficient methods to take away rust from a motorcycle is to make use of a chemical rust remover. These merchandise are sometimes made with a powerful acid, equivalent to hydrochloric acid or phosphoric acid, which can dissolve the rust. Nonetheless, it is essential to observe the producer’s directions fastidiously when utilizing these merchandise, as they are often dangerous if not used correctly. An alternative choice is to make use of a pure rust remover, equivalent to vinegar or lemon juice. These merchandise are much less harsh than chemical rust removers, however they will not be as efficient. Nonetheless, they’re a sensible choice for eradicating rust from delicate components of the bike, such because the chain or gears.

    Understanding Rust Formation

    Rust, the dreaded nemesis of bicycles, types when iron (present in metal) reacts with oxygen and water. This course of, often known as oxidation, happens naturally over time, however sure components can speed up it.

    At the beginning, moisture performs an important function. When uncovered to water or humid environments, iron readily combines with oxygen to kind rust. Saltwater, a infamous rust-inducing agent, accommodates ions that velocity up the oxidation course of. pH ranges additionally have an effect; acidic environments favor rust formation, whereas alkaline circumstances assist stop it.

    The kind of metallic used for the bike body additionally influences rust susceptibility. Excessive-carbon metal, generally present in cheap bikes, rusts extra simply than stainless-steel, which accommodates the next proportion of chromium. Moreover, scratches or coating imperfections can present entry factors for water and oxygen, initiating the rusting course of.

    Components Contributing to Rust Formation:

    Issue Rationalization
    Moisture Publicity to water or humid environments permits iron to react with oxygen.
    Saltwater Accommodates ions that speed up oxidation.
    pH Ranges Acidic environments promote rusting, whereas alkaline circumstances inhibit it.
    Metallic Kind Excessive-carbon metal rusts extra simply than stainless-steel.
    Scratches/Coating Imperfections Present entry factors for water and oxygen, initiating the rusting course of.

    Supplies Required for Rust Removing

    The effectiveness of rust removing is dependent upon the severity of the rust and the chosen supplies. Here is a complete checklist of important instruments and supplies to make sure an intensive and profitable rust removing course of:

    Materials Function
    Abrasives (Metal wool, sandpaper, wire brushes) Mechanical removing of free rust and paint
    Chemical Rust Removers (Phosphoric acid, citric acid, vinegar) Dissolution of rust for simpler removing
    Lubricants (WD-40, penetrating oil) Penetrates caught components and loosens seized bolts
    Cleansing Detergents (Cleaning soap, degreasers) Removing of dust, grime, and grease that will hinder rust removing
    Smooth Cloths (Microfiber towels, rags) Wiping and sprucing surfaces after cleansing
    Gloves, Security Glasses Safety from chemical compounds and potential hazards

    Abrasives

    In terms of eradicating rust, the best instruments make an enormous distinction. Abrasives, equivalent to metal wool, sandpaper, and wire brushes, are important for mechanically eradicating free rust and paint. Nonetheless, choosing the suitable abrasive is essential. Effective-grit metal wool or sandpaper is appropriate for delicate surfaces, whereas coarser grades can deal with heavier rust buildup. Wire brushes are efficient for cussed areas and eradicating rust from deep crevices. It is essential to notice that abrasives may take away the protecting end in your bike’s metallic surfaces, so use them with warning and keep away from extreme scrubbing.

    Residence Cures for Rust Removing

    3. White Vinegar Tub

    White vinegar is a potent acidic resolution that may successfully dissolve rust. It is a pure, non-toxic choice that is secure for many bike parts.

    Step-by-Step Information:

    * Put together the Vinegar Tub: Fill a container or bucket with sufficient white vinegar to submerge the rusty half.
    * Soak the Rusty Half: Fastidiously place the rusty bike half into the vinegar resolution.
    * Length of Soak: The soaking time varies relying on the severity of the rust. For mild rust, a 1-hour soak ought to suffice, whereas heavy rust could require a number of hours or in a single day soaking.
    * Agitation: Often agitate the answer by stirring or gently shaking the container to facilitate rust dissolution.
    * Neutralization: As soon as the rust has been sufficiently dissolved, take away the half from the vinegar tub and rinse it completely with clear water.
    * Baking Soda Neutralization: To neutralize any remaining vinegar residue, create a paste of baking soda and water. Apply the paste to the floor of the half and let it sit for 15-20 minutes earlier than wiping it away with a fabric.

    Suggestions:

    * Use a toothbrush or tender brush to softly scrub away loosened rust through the soaking course of.
    * For cussed rust, take into account including just a few tablespoons of salt to the vinegar resolution to reinforce its effectiveness.
    * If the rust is on a fragile or painted floor, check the vinegar tub on a small, inconspicuous space first to make sure it doesn’t trigger harm.

    Mechanical Abrasion Strategies

    Mechanical abrasion includes bodily eradicating rust from the bike’s floor utilizing instruments or supplies that scrape or grind away the corrosion. These strategies are efficient for eradicating heavy rust however could require vital effort.

    1. Sandpaper

    Sandpaper is a flexible software for eradicating rust from varied bike parts. Use coarse-grit sandpaper (120-150 grit) for heavy rust and finer-grit sandpaper (220-320 grit) for lighter rust. Sand the rusty floor in round motions, making use of average strain.

    2. Metal Wool

    Metal wool is one other efficient rust remover. Use fine-grade metal wool (grade 0 or 00) to keep away from scratching the bike’s floor. Moist the metal wool and rub it over the rusty space in small circles.

    3. Wire Brush

    Wire brushes are appropriate for eradicating rust from massive, flat surfaces. Select a wire brush with medium-stiff bristles to keep away from damaging the bike’s paint or metallic. Brush the rusty space in lengthy, even strokes.

    4. Dremel Instrument with Abrasive Wheel

    A Dremel software with an abrasive wheel is a robust choice for eradicating heavy rust that has penetrated the bike’s floor. Choose an abrasive wheel designed for metalwork and use it with warning to keep away from gouging the bike.

    Grit Rust Severity
    120-150 Heavy
    220-320 Mild

    Chemical Rust Removing Strategies

    White Vinegar

    White vinegar is a light acid that may assist dissolve rust. To make use of it, soak the rusted half in vinegar for a number of hours or in a single day. Then, scrub the rust away with a brush or fabric.

    Lemon Juice

    Lemon juice is one other acidic resolution that can be utilized to take away rust. Apply lemon juice to the rusted half and let it sit for a number of minutes. Then, scrub the rust away with a fabric.

    Baking Soda and Vinegar Paste

    A paste produced from baking soda and vinegar can be utilized to take away rust from bigger surfaces. To make the paste, combine equal components baking soda and vinegar. Apply the paste to the rusted space and let it sit for a number of hours or in a single day. Then, scrub the rust away with a brush or fabric.

    Industrial Rust Removers

    There are a selection of business rust removers accessible that can be utilized to take away rust from bikes. These merchandise sometimes include robust acids or solvents that may dissolve rust rapidly. Nonetheless, it is very important observe the producer’s directions fastidiously when utilizing these merchandise, as they are often dangerous if they aren’t used correctly.

    Electrolysis

    Electrolysis is a course of that makes use of an electrical present to take away rust. To make use of this methodology, you have to a battery charger, a bit of metallic that can act because the anode, and a bit of metallic that can act because the cathode. Join the anode to the optimistic terminal of the battery charger and the cathode to the adverse terminal. Then, place the rusted half in a container of water and join the anode and cathode to the rusted half. The electrical present will trigger the rust to dissolve.

    Electrolytic Rust Removing Technique

    Electrolytic rust removing is an efficient and eco-friendly methodology for eradicating cussed rust from bike parts. It includes utilizing a chemical response to interrupt down the rust and dissolve it into the answer.

    Supplies Required:

    • Massive plastic bucket or container
    • Water
    • Baking soda (sodium bicarbonate)
    • Scrap metallic or sacrificial anode (e.g., metal or iron)
    • Battery charger or energy provide
    • Connecting wires

    Process:

    1. Fill the bucket with water and dissolve baking soda in it at a ratio of 1 tablespoon per gallon of water.
    2. Submerge the rusty bike part and the sacrificial anode within the resolution.
    3. Join the optimistic terminal of the battery charger to the sacrificial anode and the adverse terminal to the rusty part.
    4. Activate the facility provide and set it to a low voltage (12-15 volts).
    5. Enable the electrolysis course of to proceed for a number of hours and even in a single day, relying on the severity of the rust.
    6. Monitor the progress sometimes and disconnect the facility when the rust has been fully eliminated.

    Suggestions:

    Tip Particulars
    Use a sacrificial anode that’s product of a extra reactive metallic than the rusty part. It will make sure that the rust is faraway from the part and deposited on the anode.
    Stir the answer sometimes to assist dissolve the rust particles. It will stop them from selecting the underside of the bucket and re-attaching to the part.
    Put on protecting gloves and goggles through the course of. Electrolysis can produce hydrogen fuel, which is flammable.

    **Stopping Future Rust**

    1. Maintain Your Bike Dry

    Rust types when moisture comes into contact with metallic. To stop rust, it is important to maintain your bike dry. After using in moist circumstances, instantly wipe down your bike with a clear towel or use a motorcycle dryer to take away any extra water.

    2. Lubricate Repeatedly

    Lubrication acts as a barrier between moisture and metallic, defending your bike from rust. Repeatedly lubricate all transferring components, together with the chain, derailleurs, and brakes, to maintain them functioning easily and forestall corrosion.

    3. Retailer Your Bike Correctly

    When storing your bike for prolonged intervals, select a dry and well-ventilated location. Keep away from storing it in damp basements or garages the place moisture can accumulate.

    4. Use Rust Inhibitors

    Rust inhibitors are chemical therapies that may be utilized to your bike to forestall corrosion. These merchandise kind a protecting layer on metallic surfaces, shielding them from moisture and oxygen.

    5. Wash Your Bike Repeatedly

    Common washing removes dust, grime, and salt that may contribute to rust formation. Use a light detergent and keep away from utilizing harsh chemical compounds or abrasive cleaners that may harm the bike’s end.

    6. Use WD-40

    WD-40 is a water-displacing lubricant that can be utilized to guard your bike from rust. Spray WD-40 on any uncovered metallic surfaces to create a barrier towards moisture and forestall corrosion.

    7. Seal and Wax Your Bike

    Making use of a sealant or wax to your bike offers an extra layer of safety towards moisture and corrosion. Sealants and waxes create a hydrophobic barrier that repels water and helps to forestall rust from forming.

    Product Description
    Phosphoric acid Reacts with rust to kind a protecting layer
    Coca-Cola Accommodates phosphoric acid, which might take away floor rust
    White vinegar Acidic and might dissolve rust

    Rust Removing from Totally different Bike Parts

    Rust can have an effect on varied bike parts, requiring particular approaches for efficient removing:

    Metal Body

    Use a wire brush and vinegar to take away superficial rust. For deeper rust, sand the affected space and apply a rust-resistant primer and paint.

    Chrome Parts

    Use a mild abrasive equivalent to baking soda or toothpaste, utilized with a tender fabric. Keep away from utilizing harsh chemical compounds to forestall harm to the chrome.

    Aluminum Parts

    Clear with a light detergent and water. Keep away from utilizing abrasive supplies or acidic cleansing options as they’ll harm the aluminum.

    Solid Iron Components

    Use a metallic brush to take away free rust. Apply a penetrating oil and let it sit for a number of hours earlier than wiping it clear.

    Gears and Chains

    Wipe with a rag soaked in mineral spirits or kerosene. Use a degreaser to take away grease and observe with a lubricant to guard the components.

    Nuts, Bolts, and Screws

    Apply penetrating oil and let it sit in a single day. Use a wrench or screwdriver to loosen the rusted components and take away the rust.

    Brake Pads

    If the rust is superficial, clear with sandpaper or a wire brush. If the rust is deep, substitute the brake pads.

    Spokes

    Use a wire brush and WD-40 to take away rust. Apply a rust-resistant lubricant or paint to guard the spokes from future corrosion.

    Advantages of Correct Rust Removing

    Rust, the results of iron oxidation, can wreak havoc in your bike. It weakens metallic parts, compromises their structural integrity, and might unfold to surrounding areas, resulting in additional harm. Correct rust removing not solely restores the aesthetic enchantment of your bike but in addition ensures its longevity and efficiency.

    1. Improved Efficiency: Rust can impede the motion of transferring components, equivalent to chains and brake pads, inflicting friction and hindering clean operation.
    2. Enhanced Sturdiness: Corrosion weakens metallic, making it extra vulnerable to bending, breaking, or cracking beneath stress.
    3. Preserved Worth: A well-maintained bike with minimal rust will keep its worth and lifespan.
    4. Prevention of Unfold: Rust can unfold from one part to a different, so eradicating it promptly prevents additional harm.
    5. Protected Operation: Rusted brakes, chains, or different very important parts can compromise security.
    6. Aesthetic Enchantment: Rust ruins the looks of a motorcycle, making it look unkempt and lowering its total aesthetic enchantment.

    9. Take away Rust from Bike Parts

    Supplies:

    Materials Function
    Rust Remover Dissolves and removes rust
    Wire Brush Removes free rust and particles
    Sandpaper (Varied Grit Ranges) Smooths and polishes the floor
    Rust-Resistant Coating Protects the handled floor from future rust

    Process:

    1. Determine the rusted areas and decide the severity of the rust.
    2. Apply a rust remover to the affected space and permit it to soak for the really useful time.
    3. Use a wire brush to softly take away any free rust and particles.
    4. Sand the floor with varied grit ranges of sandpaper, beginning with a rough grit to take away any remaining rust and regularly transferring to a finer grit to clean the floor.
    5. Clear the floor completely to take away any residual mud or particles.
    6. Apply a rust-resistant coating to the handled space to guard it from future corrosion.

    1. Vinegar Soak

    Vinegar is a light acid that may dissolve rust. To make use of this methodology, fill a bucket or bowl with white vinegar and submerge the rusty components of your bike in it. Let it soak for a number of hours or in a single day. As soon as the rust is dissolved, rinse the components completely with water and dry them with a clear fabric.

    2. Baking Soda Paste

    Baking soda is a light abrasive that may assist to wash away rust. To make use of this methodology, make a paste of baking soda and water. Apply the paste to the rusty areas of your bike and let it sit for a number of hours. As soon as the paste has dried, rinse the components completely with water and dry them with a clear fabric.

    3. Lemon Juice

    Lemon juice is one other gentle acid that may dissolve rust. To make use of this methodology, minimize a lemon in half and rub it over the rusty areas of your bike. Let the lemon juice sit for a number of hours or in a single day. As soon as the rust is dissolved, rinse the components completely with water and dry them with a clear fabric.

    4. Coca-Cola

    Coca-Cola accommodates phosphoric acid, which might dissolve rust. To make use of this methodology, pour Coca-Cola over the rusty areas of your bike and let it sit for a number of hours or in a single day. As soon as the rust is dissolved, rinse the components completely with water and dry them with a clear fabric.

    5. WD-40

    WD-40 is a water-displacing lubricant that may assist to forestall rust. To make use of this methodology, spray WD-40 on the rusty areas of your bike and let it sit for a number of hours or in a single day. As soon as the WD-40 has penetrated the rust, wipe it away with a clear fabric.

    6. Naval Jelly

    Naval jelly is a business rust remover that could be very efficient at eradicating rust. To make use of this methodology, apply naval jelly to the rusty areas of your bike and let it sit for a number of hours or in a single day. As soon as the rust is dissolved, rinse the components completely with water and dry them with a clear fabric.

    7. Rust Remover Gel

    Rust remover gel is one other business rust remover that could be very efficient at eradicating rust. To make use of this methodology, apply rust remover gel to the rusty areas of your bike and let it sit for a number of hours or in a single day. As soon as the rust is dissolved, rinse the components completely with water and dry them with a clear fabric.

    8. Electrolysis

    Electrolysis is a course of that makes use of electrical energy to take away rust. To make use of this methodology, you have to a battery charger, a bucket or bowl, and a few salt. Fill the bucket or bowl with water and add some salt. Join the optimistic terminal of the battery charger to the rusty components of your bike and the adverse terminal to a metallic object that’s submerged within the water. Activate the battery charger and let it run for a number of hours or in a single day. As soon as the rust is dissolved, rinse the components completely with water and dry them with a clear fabric.

    9. Sandblasting

    Sandblasting is a course of that makes use of sand to take away rust. To make use of this methodology, you have to a sandblaster and a few sand. Put on protecting clothes and goggles when utilizing a sandblaster. Level the sandblaster on the rusty areas of your bike and blast away the rust. As soon as the rust is eliminated, rinse the components completely with water and dry them with a clear fabric.

    10. Wire Brushing

    Wire brushing is a course of that makes use of a wire brush to take away rust. To make use of this methodology, put on protecting gloves and goggles. Brush the rusty areas of your bike with the wire brush till the rust is eliminated. As soon as the rust is eliminated, rinse the components completely with water and dry them with a clear fabric.

    Conclusion: Sustaining a Rust-Free Bike


    After getting eliminated the rust out of your bike, it is very important take steps to forestall it from rusting once more. Listed here are just a few suggestions:

    Tip

    Description

    Wash your bike frequently Grime and dirt can lure moisture towards the metallic, which might result in rust.
    Dry your bike completely After washing your bike, dry it completely with a clear fabric.
    Apply a rust-preventative coating There are a variety of business rust-preventative coatings accessible. Apply certainly one of these coatings to your bike after washing and drying it.
    Retailer your bike in a dry place If you end up not using your bike, retailer it in a dry place.

    Take away Rust From Your Bike

    Rust is the results of iron or metal coming into contact with oxygen and moisture. It may be a serious downside for bikes, as it may possibly weaken the body and parts and make them extra prone to fail. There are just a few alternative ways to take away rust from a motorcycle, relying on the severity of the rust. If the rust is superficial, you may merely use a light abrasive equivalent to metal wool or sandpaper to take away it. If the rust is extra extreme, you might want to make use of a chemical rust remover.

    After getting eliminated the rust, it is very important shield the bike from future rusting. You are able to do this by making use of a rust-resistant coating to the body and parts. There are a selection of rust-resistant coatings accessible, so you should definitely select one that’s applicable for the kind of bike you could have.

    Individuals additionally ask about Take away Rust From Bike

    How do you take away rust from a motorcycle chain?

    You’ll be able to take away rust from a motorcycle chain by soaking it in a rust-removing resolution, equivalent to vinegar or WD-40. As soon as the chain has soaked for just a few hours, use a brush or rag to wash off the rust. Rinse the chain with water and dry it completely earlier than reattaching it to the bike.

    How do you take away rust from a motorcycle body?

    You’ll be able to take away rust from a motorcycle body utilizing the identical strategies that you’d use to take away rust from every other metallic floor. First, attempt utilizing a light abrasive equivalent to metal wool or sandpaper to take away the rust. If the rust is extra extreme, you might want to make use of a chemical rust remover.

    How do you stop rust on a motorcycle?

    One of the simplest ways to forestall rust on a motorcycle is to maintain it clear and dry. After every experience, wipe down the bike with a clear fabric to take away any dust or moisture. If the bike goes to be saved for a protracted time period, apply a rust-resistant coating to the body and parts.

  • 5 Easy Steps to Create a Captivating Chinese Lantern

    5 Easy Steps to Remove a Bathtub Stopper

    5 Easy Steps to Create a Captivating Chinese Lantern

    Featured Picture: https://tse1.mm.bing.net/th?q=$title$

    Bathtub stoppers are an necessary a part of any rest room, however they will generally turn out to be caught or clogged. Should you’re having hassle eradicating your stopper, don’t be concerned – there are a number of easy strategies you possibly can strive. First, strive utilizing a pair of pliers to softly grip the stopper and pull it out. If that does not work, you possibly can strive utilizing a screwdriver to pry the stopper free. Lastly, if all else fails, you possibly can strive utilizing a chemical drain cleaner to dissolve the clog.

    Nevertheless, earlier than you begin eradicating the stopper, it is necessary to establish what kind of stopper you have got. There are two important sorts of bathtub stoppers: pop-up stoppers and screw-in stoppers. Pop-up stoppers are the commonest kind, they usually’re often made from rubber or plastic. Screw-in stoppers are much less widespread, they usually’re often made from metallic. As soon as you recognize what kind of stopper you have got, you possibly can observe the suitable directions under to take away it.

    When you’ve got a pop-up stopper, you possibly can take away it by following these steps: First, take away the drain cowl. Subsequent, insert a pair of pliers into the drain and grip the stopper. Lastly, pull the stopper out of the drain. When you’ve got a screw-in stopper, you possibly can take away it by following these steps: First, insert a screwdriver into the slot on the highest of the stopper. Subsequent, flip the screwdriver counterclockwise to loosen the stopper. Lastly, pull the stopper out of the drain.

    Figuring out the Kind of Stopper

    Earlier than making an attempt to take away a bath stopper, it is essential to establish its kind. Bathtub stoppers are available varied designs, every requiring a particular elimination technique. Listed below are the commonest sorts of bathtub stoppers:

    Raise-and-Flip Stopper

    The sort of stopper consists of a small knob or deal with that you simply raise and switch to open or shut the drain. The knob is often situated on the highest of the stopper, and it might have a easy or ornamental design. To take away a lift-and-turn stopper, merely raise the deal with and unscrew it counterclockwise.

    Pop-Up Stopper

    Pop-up stoppers are designed to open and shut by urgent or stepping on a small button or lever situated on the highest of the stopper. While you press the button, the stopper pops as much as open the drain, and whenever you launch it, the stopper sinks again down to shut the drain. To take away a pop-up stopper, you will want to make use of a particular instrument referred to as a pop-up stopper wrench. This wrench has a protracted, skinny deal with with a U-shaped finish that matches across the underside of the stopper. As soon as the wrench is securely in place, you possibly can flip it counterclockwise to loosen and take away the stopper.

    Flip-It Stopper or Toe-Faucet Stopper

    A flip-it stopper operates by flipping a small lever or plate on the highest of the stopper. This lever is often situated on the facet or again of the stopper. To open the drain, you flip the lever up or down. To shut it, you merely flip the lever again to its authentic place. Flip-it stoppers may be eliminated by unscrewing a small screw that’s situated within the middle of the lever.

    | Tub Stopper Kind | Elimination Methodology |
    |—|—|
    | Raise-and-Flip | Raise and unscrew counterclockwise |
    | Pop-Up | Use a pop-up stopper wrench to loosen and take away |
    | Flip-It | Unscrew the small screw within the middle of the lever |

    Instruments and Supplies Required

    Earlier than you start the method of eradicating the bath stopper, it is important to collect the mandatory instruments and supplies to make sure a easy and environment friendly activity. Here is a complete listing:

    Wrench

    Relying on the kind of bathtub stopper, you could want an adjustable wrench or a specific-size wrench. The adjustable wrench supplies versatility for various stopper designs, whereas a specific-size wrench affords a cosy match for optimum grip.

    Pliers

    A pair of needle-nose pliers is a invaluable instrument for gripping and manipulating small parts of the bath stopper. Their precision ideas assist you to entry and maneuver in tight areas, making them excellent for delicate operations.

    Screwdriver

    A screwdriver, both a flathead or a Phillips head, could also be required based mostly on the stopper’s design. Select the suitable screwdriver that aligns with the screw heads on the stopper to keep away from any stripping or injury.

    Flashlight

    A flashlight supplies illumination in poorly lit areas beneath the bath, permitting you to obviously see the stopper and its parts. This enhanced visibility helps in figuring out the placement of screws and different particulars that is probably not obvious in dim lighting.

    Gloves

    Carrying a pair of rubber gloves is really useful for defense from potential publicity to water, grime, or cleansing brokers throughout the elimination course of.

    Cleansing Answer

    A gentle cleansing answer, equivalent to dish cleaning soap diluted with water, can be utilized to scrub the eliminated stopper and different parts. This step helps take away any particles or buildup which will have accrued over time.

    Instrument Objective
    Wrench Loosening and tightening nuts or bolts
    Pliers Gripping and manipulating small parts
    Screwdriver Eradicating or tightening screws
    Flashlight Offering illumination in poorly lit areas
    Gloves Defending palms from grime or water
    Cleansing Answer Cleansing eliminated stopper and parts

    Eradicating a Screw-In Stopper

    Step 1: Find the Stopper’s Screw

    Rigorously look at the drain stopper for a small screw or bolt head. This often lies within the middle of the stopper, the place the rod protrudes.

    Step 2: Take away the Screw

    Utilizing a screwdriver or wrench, loosen the screw by turning it counterclockwise. Be mild and keep away from overtightening, as this might injury the stopper or the drain meeting.

    Step 3: Extract the Stopper

    As soon as the screw is eliminated, you possibly can detach the stopper. Grasp the stopper firmly along with your fingers or a pair of pliers. Gently pull it straight up and out of the drain gap. If the stopper is caught, strive wiggling it or utilizing a light pry instrument to loosen it.

    Extracting a Pop-Up Stopper

    The sort of drain stopper is the commonest. It consists of a rubber or silicone plug that matches right into a drain opening and is linked to a metallic rod that extends up by way of the drainpipe. To take away such a stopper, observe these steps:

    1. Seize the stopper stem. The stopper stem is the metallic rod that extends up by way of the drainpipe and is linked to the rubber or silicone plug. On most pop-up stoppers, you should utilize the metallic a part of the stopper stem because the place to understand along with your pliers.
    2. Pull up on the stopper stem. Grip the stopper stem with pliers and pull up on it. You could want to make use of somewhat little bit of drive, however the stopper ought to ultimately come free.
    3. Take away the rubber or silicone plug. After getting pulled up on the stopper stem and eliminated the metallic rod, you possibly can take away the rubber or silicone plug by pulling it out of the drain opening.
    4. Clear the drainpipe. After getting eliminated the stopper, take a couple of minutes to scrub the drainpipe. You are able to do this by operating sizzling water down the drain and utilizing a drain cleaner to take away any build-up or particles.

    Coping with a Flip-It Stopper

    A flip-it stopper is a sort of tub stopper that’s operated by a lever. To take away a flip-it stopper, observe these steps:

    1. Find the lever. The lever is often situated on the highest of the stopper.
    2. Flip the lever. Push down on the lever to unlock the stopper.
    3. Pull the stopper. Raise the stopper out of the drain.
    4. Clear the stopper. Wash the stopper with cleaning soap and water.
    5. Reinstall the stopper.
    • For a 1 1/4-inch drain: Take away the stopper by pulling straight up on the highest of the stopper.
    • For a 1 1/2-inch drain: Take away the stopper by turning the highest of the stopper counterclockwise after which pulling it straight up.
    • For a 2-inch drain: Take away the stopper by pulling straight up on the highest of the stopper. If the stopper is caught, use a pair of pliers to softly pull it out.

    As soon as the stopper is eliminated, clear it with cleaning soap and water and reinstall it by following the steps in reverse order.

    Troubleshooting a Caught Stopper

    In case your bathtub stopper is caught, there are some things you possibly can attempt to loosen it.

    1. Use a wrench. If the stopper has a deal with, you possibly can strive utilizing a wrench to loosen it. Place the wrench on the deal with and switch it counterclockwise.
    2. Use pliers. If the stopper doesn’t have a deal with, you possibly can strive utilizing pliers to loosen it. Grip the stopper with the pliers and switch it counterclockwise.
    3. Use a screwdriver. If the stopper is made from metallic, you possibly can strive utilizing a screwdriver to loosen it. Insert the screwdriver into the slot on the stopper and switch it counterclockwise.
    4. Use a butter knife. If the stopper is made from plastic, you possibly can strive utilizing a butter knife to loosen it. Insert the butter knife into the slot on the stopper and switch it counterclockwise.
    5. Use a pair of needle-nose pliers. If the stopper is small or troublesome to succeed in, you possibly can strive utilizing a pair of needle-nose pliers to loosen it. Grip the stopper with the pliers and switch it counterclockwise.

    If you’re unable to loosen the stopper utilizing any of those strategies, you could must name a plumber. A plumber can have the instruments and experience to take away the stopper safely and with out damaging your bathtub.

    Methodology Issue Instruments Required
    Use a wrench Straightforward Wrench
    Use pliers Medium Pliers
    Use a screwdriver Medium Screwdriver
    Use a butter knife Straightforward Butter knife
    Use a pair of needle-nose pliers Troublesome Needle-nose pliers

    Cleansing and Inspecting the Stopper

    As soon as you have eliminated the stopper, it is necessary to scrub and examine it. This can enable you to decide if it must be changed. To scrub the stopper, use a light cleaning soap and water answer. Remember to rinse the stopper completely and dry it fully earlier than reinstalling it.

    Examine the stopper for any injury. Should you see any cracks, chips, or different injury, the stopper needs to be changed. A broken stopper can leak water and trigger injury to your bathtub.

    Along with cleansing and inspecting the stopper, you must also verify the drain opening for any particles. Particles can construct up over time and stop the stopper from sealing correctly. To scrub the drain opening, use a drain snake or a pair of pliers to take away any particles.

    As soon as you have cleaned and inspected the stopper and drain opening, you possibly can reinstall the stopper. To reinstall the stopper, merely insert the stopper into the drain opening and switch it clockwise till it is tight.

    Stopper Kind Elimination Methodology
    Raise-and-Flip Raise the stopper up and switch it counterclockwise to take away it.
    Push-and-Pull Push down on the stopper and pull it as much as take away it.
    Screw-in Use a screwdriver to take away the screw that holds the stopper in place.

    Eradicating the Stopper

    Find the screw that holds the stopper in place. It’s often situated within the middle of the stopper, beneath a small cap. Use a screwdriver to take away the screw.

    As soon as the screw is eliminated, the stopper will come free. You could want to make use of a pair of pliers to softly pry it off.

    Cleansing the Drain

    Use a drain cleaner to scrub the drain. Observe the producer’s directions to be used.

    As soon as the drain is clear, rinse it completely with water.

    Putting in the New Stopper

    Place the brand new stopper within the drain.

    Insert the screw into the opening within the middle of the stopper. Tighten the screw till the stopper is safe.

    Changing the Stopper

    In case your bathtub stopper is broken or now not works correctly, you could want to exchange it. Listed below are the steps on easy methods to substitute a bath stopper:

    1. Take away the previous stopper. See the directions for eradicating the bath stopper above.

    2. Clear the drain. See the directions for cleansing the drain above.

    3. Buy a brand new stopper. When buying a brand new stopper, be sure to decide on one that’s the proper measurement and form to your bathtub drain.

    4. Insert the brand new stopper. Place the brand new stopper within the drain and press down firmly till it’s in place.

    5. Tighten the screw. Most stoppers have a screw that must be tightened to carry it in place. Use a screwdriver to tighten the screw till the stopper is safe.

    6. Take a look at the stopper. As soon as the brand new stopper is put in, check it to ensure that it’s working correctly. Run some water into the bath and verify to see if the stopper stops the water from draining. If the stopper will not be working correctly, alter the screw till it’s.

    Kind of Stopper Directions
    Pop-up stopper Raise the stopper to open it and push it down to shut it.
    Toe-touch stopper Use your toe to push the stopper down to shut it and raise it as much as open it.
    Raise-and-turn stopper Raise the stopper to open it and switch it to shut it.

    Eradicating a Bathtub Stopper

    1. Examine the stopper to find out its kind (pop-up or drain plug).
    2. For pop-up stoppers, use a flathead screwdriver or suction cup to raise the stopper and take away it.
    3. For drain plug stoppers, flip the knob or lever counterclockwise to loosen and take away it.
    4. Use pliers or a wrench to grip and unscrew the raise rod from the drain meeting.
    5. Pull up the stopper meeting to take away it from the drain opening.
    6. Clear all parts with an answer of vinegar and water or industrial drain cleaner.
    7. Reassemble the stopper meeting and tighten the raise rod securely.
    8. Take a look at the stopper to make sure it operates correctly.
    9. To stop future clogs, commonly take away particles from the stopper and drain, equivalent to hair, cleaning soap scum, and grime.

    Stopping Future Clogs

    To stop future bathtub clogs, take into account the next ideas:

    Tip
    Use a bath strainer to catch hair and different particles.
    Clear the bath drain commonly with an answer of vinegar and water or industrial drain cleaner.
    Keep away from utilizing harsh chemical compounds or bleach within the bathtub, as they will injury the drain.
    Examine the drain periodically for leaks or obstructions.
    Take into account putting in a hair catcher or drain cowl to forestall bigger particles from coming into the drain.
    Preserve an everyday cleansing schedule for the bath and drain to forestall buildup of grime and particles.
    Search skilled assist from a plumber if persistent clogs happen or when you can not take away the stopper your self.

    Security Precautions

    Earlier than beginning any work, guarantee your security by taking these precautions:

    1. Put on Gloves

    Shield your palms from sharp edges or chemical compounds by carrying gloves, ideally of rubber or nitrile materials.

    2. Flip Off Water Provide

    Shut off the primary water provide valve to forestall any flooding or water injury throughout the course of.

    3. Disconnect Pop-Up Stopper

    If the bath has a pop-up stopper, raise it up and pull the plug out of the drain.

    4. Take away Raise Rod

    If the stopper is linked to a raise rod, use a pair of pliers or a wrench to disconnect it from the stopper on the base.

    5. Safety for Knees

    Place a towel or mat beneath your knees to cushion them when you work.

    6. Use a Flashlight

    If mandatory, use a flashlight to light up the drain space and see higher inside.

    7. Put on Security Glasses

    Forestall any eye accidents by carrying security glasses to guard your eyes from falling particles or splashing water.

    8. Examine for Hair and Particles

    Examine the drain and take away any seen hair or particles that would hinder the method.

    9. Keep away from Utilizing Harsh Chemical substances

    Whereas utilizing chemical compounds like drain cleaner could appear tempting, it is not really useful as they will injury the bath or drain.

    10. Search Skilled Assist if Wanted

    Should you encounter any difficulties or have a particular kind of tub stopper that you simply’re undecided easy methods to take away, do not hesitate to name a plumber for skilled help.

    How you can Take away a Bathtub Stopper

    There are a number of alternative ways to take away a bath stopper, relying on the kind of stopper you have got. Listed below are the commonest strategies:

    When you’ve got a lift-and-turn stopper:

    1. Raise the stopper up till it is absolutely open.
    2. Flip the stopper counterclockwise to loosen it.
    3. As soon as the stopper is free, pull it up and out of the drain.

    When you’ve got a push-and-pull stopper:

    1. Push the stopper down to shut it.
    2. Pull up on the stopper to open it.
    3. As soon as the stopper is open, pull it up and out of the drain.

    When you’ve got a screw-in stopper:

    1. Use a screwdriver to take away the screw that holds the stopper in place.
    2. As soon as the screw is eliminated, pull the stopper up and out of the drain.


    Folks Additionally Ask About How you can Take away a Bathtub Stopper

    How do I take away a caught bathtub stopper?

    In case your bathtub stopper is caught, you possibly can strive utilizing a pair of pliers to loosen it. Grip the stopper with the pliers and switch it counterclockwise. If the stopper remains to be caught, you possibly can strive utilizing a penetrating oil to loosen it. Apply the oil to the threads of the stopper and let it sit for a couple of minutes earlier than making an attempt to take away it.

    How do I substitute a bath stopper?

    To interchange a bath stopper, first take away the previous stopper utilizing one of many strategies described above. As soon as the previous stopper is eliminated, clear the drain and apply a bead of silicone caulk across the base of the brand new stopper. Insert the brand new stopper into the drain and press down firmly to safe it. Enable the caulk to dry fully earlier than utilizing the stopper.

    What’s the greatest kind of tub stopper?

    There are various several types of bathtub stoppers accessible, so the very best kind for you’ll rely in your wants and preferences. Raise-and-turn stoppers are the commonest kind, and they’re simple to make use of and take away. Push-and-pull stoppers are additionally simple to make use of, however they are often harder to take away than lift-and-turn stoppers. Screw-in stoppers are probably the most safe kind of stopper, however they are often harder to put in and take away.