
Preserving recollections by way of bodily pictures presents a tangible approach to maintain on to cherished moments. Nevertheless, discovering inventive methods to show these photographs can current a problem. Adhering photographs to wooden is an modern strategy that provides heat and character to any house. The pure texture of the wooden enhances the vibrancy of the photographs, creating eye-catching and distinctive shows.
Earlier than embarking on this venture, it’s important to assemble the required supplies and put together the wooden floor. Medium-density fiberboard (MDF) or plywood supplies a superb base for adhering photographs. Sanding the floor calmly helps create a easy and even base for the adhesive. Moreover, selecting the best adhesive is essential for long-lasting outcomes. Picture-mounting adhesives particularly designed for adhering photographs to numerous surfaces supply one of the best efficiency.
As soon as the wooden floor is ready and the adhesive chosen, rigorously apply the adhesive to the again of the picture. Keep away from utilizing an excessive amount of adhesive, as it might trigger the picture to wrinkle or bubble. Align the picture with the wooden floor and press it down firmly, making certain that each one edges are securely adhered. Clean out any air bubbles or wrinkles utilizing a rolling pin or a squeegee. Permit the adhesive to dry utterly earlier than displaying your picture collage. The ensuing show will showcase your recollections in a novel and trendy manner, including a contact of heat and persona to your own home decor.
Selecting the Proper Wooden
The kind of wooden you choose in your venture will considerably influence the adhesion of the picture. Listed here are some components to contemplate:
Grain Course: The grain path refers back to the alignment of the wooden fibers. Adhering a photograph to wooden with the grain will present higher adhesion than towards the grain. It’s because the glue will penetrate the wooden extra simply alongside the grain traces.
Wooden Density: Denser woods, comparable to oak or maple, supply higher floor space for the glue to seize onto, leading to stronger adhesion. Much less dense woods, like pine or balsa, have a extra porous construction and require extra glue to realize a safe bond.
Wooden Moisture Content material: The moisture content material of the wooden can have an effect on the adhesion of the picture. Ideally, the wooden must be dry and seasoned. Moist or damp wooden may cause the glue to weaken or forestall it from bonding correctly.
| Wooden Sort |
Grain Course |
Density |
Moisture Content material |
| Oak |
Straight |
Excessive |
Dry |
| Maple |
Straight |
Excessive |
Dry |
| Pine |
Variable |
Low |
Dry |
| Balsa |
Straight |
Very Low |
Dry |
Deciding on the Acceptable Adhesive
When selecting an adhesive for adhering photographs to wooden, take into account the next components:
- Bond power: The adhesive ought to present a robust and lasting bond between the picture and wooden.
- Drying time: Select an adhesive with a drying time that enables ample time for positioning and changes.
- End: Take into account the specified end of the adhered picture. Some adhesives depart a noticeable residue or discoloration.
- Compatibility with wooden: Be certain that the adhesive is appropriate with the kind of wooden you might be utilizing. Some adhesives might injury sure wooden finishes.
- Flexibility: Wooden expands and contracts with adjustments in temperature and humidity. Select an adhesive that is still versatile to stop cracking or peeling.
Here’s a desk summarizing a few of the commonest sorts of adhesives for adhering photographs to wooden:
| Adhesive Sort |
Bond Power |
Drying Time |
End |
Compatibility |
Flexibility |
| Wooden Glue |
Robust |
Brief |
Clear |
Wooden |
Low |
| Contact Cement |
Very Robust |
Quick |
Everlasting |
Wooden, Steel, Plastic |
Excessive |
| Double-Sided Tape |
Average |
Quick |
Invisible |
Most Surfaces |
Excessive |
| Decoupage Medium |
Average to Robust |
Variable |
Matte or Shiny |
Wooden, Paper, Material |
Low |
| Gel Medium |
Robust |
Medium |
Clear |
Wooden, Canvas, Paper |
Excessive |
Getting ready the Wooden Floor
Totally clear the wooden floor to take away any grime, mud, or grease. Use a smooth fabric dampened with a gentle cleaner or denatured alcohol. Permit the floor to dry utterly earlier than continuing.
Sand the floor of the wooden calmly with fine-grit sandpaper to create a barely tough texture. This can assist the adhesive bond higher to the wooden. Take away any sanding mud with a clear fabric.
If the wooden is porous, comparable to unfinished plywood or softwoods, apply a skinny layer of wooden conditioner or primer to seal the pores. This can forestall the adhesive from being absorbed too shortly, making certain a robust bond.
If the wooden is oily or has been handled with a sealant, comparable to varnish or polyurethane, you will need to take away the sealant earlier than adhering the picture. Use a industrial sealant remover or fine-grit sandpaper to take away the sealant from the floor.
Observe: For finest outcomes, use a high-quality wooden adhesive particularly designed for bonding photographs to wooden.
| Wooden Sort |
Preparation Technique |
| Unvarnished Wooden |
Clear, sand, and apply wooden conditioner |
| Oiled Wooden |
Clear and take away sealant |
| Sealed Wooden |
Take away sealant and sand |
| Plywood |
Clear, sand, and apply wooden conditioner |
| Softwoods |
Clear, sand, and apply wooden conditioner |
Cleansing the Picture
If you’re working with a treasured or irreplaceable picture, it is important to deal with it with the utmost care. Earlier than adhering it to wooden, completely clear the picture to take away any mud, grime, or fingerprints that might intervene with the adhesion course of.
Supplies you will want:
| Merchandise |
Utilization |
| Smooth-bristled brush |
Gently take away free grime and mud |
| Microfiber fabric |
Wipe away fingerprints and smudges |
| Distilled water |
Dissolve any remaining residue |
| Isopropyl alcohol (non-obligatory) |
For cussed stains or adhesive residue |
The right way to clear the picture:
- Begin with a dry brush. Use a soft-bristled brush to softly take away any free grime or mud from the floor of the picture. Watch out to not apply an excessive amount of strain, as you possibly can injury the picture.
- Wipe with a microfiber fabric. As soon as you have eliminated the free grime, wipe the picture down with a clear, dry microfiber fabric. This can assist to take away any fingerprints or smudges.
- Dissolve any remaining residue. If there may be any remaining residue on the picture, you may dissolve it with a cotton swab dipped in distilled water. Gently rub the cotton swab over the residue in a round movement.
- Take away cussed stains with isopropyl alcohol. If you happen to encounter any cussed stains or adhesive residue, you may strive eradicating them with isopropyl alcohol. Apply a small quantity of isopropyl alcohol to a cotton swab and gently rub it over the stain or residue. Make sure you check the alcohol on an not easily seen space of the picture first to make sure that it doesn’t injury the floor.
Making use of the Adhesive
The kind of adhesive you select will rely on the kind of wooden and picture you are working with. For many functions, a water-based adhesive comparable to Mod Podge or Elmer’s Glue will work properly. If you happen to’re utilizing a very porous wooden, you might wish to use a thicker adhesive comparable to epoxy or wooden glue.
To use the adhesive, first unfold a skinny layer over the floor of the wooden the place you wish to place the picture. Then, rigorously place the picture on high of the adhesive and press down gently to take away any air bubbles.
If you happen to’re utilizing a water-based adhesive, you should use a humid fabric to wipe away any extra glue that seeps out from across the edges of the picture. If you happen to’re utilizing a thicker adhesive, you might want to make use of a putty knife or different instrument to take away the surplus glue.
5. Drying the Picture
As soon as the adhesive has been utilized, enable the picture to dry utterly earlier than transferring it. The drying time will differ relying on the kind of adhesive you are utilizing, however most adhesives will dry inside just a few hours.
Whereas the picture is drying, it is vital to maintain it in a protected place the place it won’t be disturbed. It’s possible you’ll wish to weigh the picture down with a heavy object to assist it keep flat.
Here’s a desk summarizing the completely different drying occasions for several types of adhesives:
| Adhesive Sort |
Drying Time |
| Water-based adhesive |
1-2 hours |
| Epoxy |
24 hours |
| Wooden glue |
12-24 hours |
Positioning the Picture
Marking the Middle of the Picture and Wooden
To align the picture exactly, mark the middle factors of each the picture and the wooden floor. Use a ruler or measuring tape and a pencil to attract a small dot on the precise heart.
Measuring and Marking the Picture Placement
Measure the gap from the sides of the wooden to the perimeters of the picture. Switch these measurements to the picture, once more marking the factors with small dots. This can aid you decide the precise place of the picture on the wooden.
Utilizing a Grid or Template for Alignment
For bigger photographs or complicated designs, think about using a grid or template to help with positioning. Create a grid of intersecting traces on the wooden or picture to information your placement. Alternatively, you should use a template made out of cardboard or tracing paper with the picture’s define traced on it.
Double-Checking the Placement
Earlier than making use of any adhesive, double-check the picture’s placement. Maintain it as much as the wooden and align the marked factors and features. Make any needed changes till the picture is positioned as desired.
Utilizing Momentary Tape for Positioning
To make sure the picture stays in place whilst you apply the adhesive, use small items of momentary tape. Apply the tape to the corners or edges of the picture and gently press it onto the wooden. This can forestall the picture from shifting throughout the adhesion course of.
Effective-Tuning the Alignment
After making use of the momentary tape, rigorously alter the picture’s alignment as wanted. Use a ruler or your eye to verify for any discrepancies and make minor changes till the picture is completely centered and aligned on the wooden.
Securing the Picture with Strain
Mount the picture on the wooden utilizing a press to use even strain and guarantee a safe bond. This is a step-by-step information to utilizing a press:
Supplies:
| Materials |
Amount |
| Mounting Press |
1 |
| Picture |
1 |
| Wooden panel |
1 |
| Wax paper or parchment paper |
2 sheets |
Directions:
- Place the picture face down on one sheet of wax paper.
- Middle the picture on the wooden panel.
- Place the second sheet of wax paper over the picture.
- Insert the wooden panel between the press plates.
- Apply even strain to the press.
- Maintain for 5-10 minutes.
- Take away the picture and examine the bond.
If needed, repeat steps 4-6 with further strain or time to make sure a safe attachment.
Utilizing a press supplies constant and dependable strain, leading to a professional-looking bond between the picture and the wooden. This methodology is right for large-scale or industrial picture mounting tasks.
Eradicating Any Extra Adhesive
1. Permit the Adhesive to Treatment Partially
Earlier than making an attempt to take away any extra adhesive, it is vital to present it an opportunity to treatment partially. This can make the adhesive much less sticky and simpler to deal with.
2. Use a Scraper Instrument
A pointy scraper instrument can be utilized to softly scrape away any extra adhesive from the floor of the wooden. Watch out to not apply an excessive amount of strain, as this might injury the wooden.
3. Use a Cleansing Resolution
A gentle cleansing answer, comparable to rubbing alcohol or acetone, can be utilized to dissolve any remaining adhesive residue. Apply the answer to a clear fabric and gently wipe away the adhesive.
4. Use Warmth
Warmth can assist to melt the adhesive, making it simpler to take away. Use a warmth gun or a hair dryer to use warmth to the adhesive. Watch out to not overheat the wooden, as this might injury it.
5. Use an Adhesive Remover
If the opposite strategies do not work, you may strive utilizing a industrial adhesive remover. Observe the directions on the product label rigorously. Make sure you check the remover on a small, inconspicuous space first to verify it does not injury the wooden.
6. Use a Sanding Block
A fine-grit sanding block can be utilized to sand away any remaining adhesive residue. Watch out to not sand too aggressively, as this might injury the wooden.
7. Use a Vacuum Cleaner
A vacuum cleaner can be utilized to take away any mud or particles that has accrued from the earlier steps.
8. Cleansing with Wooden Cleaner Resolution
| Materials |
Utilization |
Wooden Cleaner
Resolution |
Apply the wooden cleaner answer to a clear fabric and gently wipe the floor of the wooden to wash the floor. |
Sealing the Picture for Safety
After adhering the picture to the wooden, it is important to seal it to guard it from moisture, fading, and injury. Listed here are the steps concerned in sealing the picture:
Sanding the Picture
Frivolously sand the floor of the picture with fine-grit sandpaper to create a easy floor for the sealant to stick to.
Making use of a Primer
Apply a skinny layer of picture primer to the picture to create a barrier between the picture and the sealant. Permit the primer to dry utterly.
Selecting a Sealant
Choose an acceptable sealant for the meant use and atmosphere of the picture. Choices embrace clear acrylic sealant, UV-resistant sealant, or epoxy resin.
Making use of the Sealant
Apply the sealant in skinny, even layers utilizing a brush or foam applicator. Permit every layer to dry earlier than making use of the subsequent one.
Curing the Sealant
Observe the producer’s directions for curing the sealant. This may increasingly contain drying it at a particular temperature or exposing it to daylight.
A number of Layers
For added safety, apply a number of layers of sealant. Sand calmly between every layer to make sure a easy end.
Estimated Drying Time
| Sealant Sort | Estimated Drying Time |
|—|—|
| Clear Acrylic Sealant | 1 hour |
| UV-Resistant Sealant | 1-2 hours |
| Epoxy Resin | 24-72 hours |
Supplies
Glue: Use wooden glue particularly designed for pictures, comparable to Acid-Free Picture Mount Adhesive. It’s acid-free, stopping the picture from yellowing over time.
Mod Podge: A flexible adhesive that can be utilized on wooden and supplies a shiny end when dried.
Spray Adhesive: Quick-drying adhesive that creates a robust bond. Nevertheless, keep away from utilizing an excessive amount of, as it might wrinkle the picture.
Double-Sided Tape: Acid-free, photo-safe tape that gives a robust bond with out damaging the picture.
Picture Switch Medium: A liquid utilized to the picture earlier than ironing it onto the wooden, making a everlasting and sturdy bond.
Wooden: Use a easy, sanded floor for finest adhesion. Uncooked wooden requires sealing with a primer earlier than making use of the picture.
Ideas for Lengthy-Lasting Adhesion
1. Put together the Wooden Floor
Sand the wooden floor to easy it and take away any grime or particles. Apply a coat of primer to uncooked wooden to stop moisture absorption from the picture.
2. Select the Proper Adhesive
Take into account the kind of wooden, picture, and desired end when deciding on the adhesive.
3. Apply the Adhesive Evenly
Use a skinny, even layer of adhesive to stop wrinkles or bubbles.
4. Align the Picture Fastidiously
Place the picture on the wooden earlier than the adhesive dries to make sure correct alignment.
5. Press Firmly
Use a curler, press, and even books to use strain and guarantee good contact between the picture and wooden.
6. Permit Ample Drying Time
Observe the adhesive’s directions for drying time. Keep away from dealing with the piece till it is utterly dry.
7. Defend the Picture
Apply a transparent sealant or varnish to the floor of the picture to guard it from moisture and UV injury.
8. Use Acid-Free Supplies
Guarantee all supplies used, together with glue, tape, and paper, are acid-free to stop picture deterioration.
9. Take a look at on a Scrap Piece
Earlier than making use of adhesive to the ultimate piece, check on a scrap piece of wooden to make sure the adhesive is appropriate.
10. Take into account the Picture’s Thickness and End
thicker photographs or these with shiny finishes might require extra adhesive or a unique methodology, comparable to picture switch medium.
How To Adhere A Picture To Wooden
Adhering a photograph to wooden is an easy and efficient approach to create a novel and private piece of artwork. With just a few easy steps, you may create a fantastic and lasting memento.
**Supplies:**
- Wooden floor
- Picture
- Mod Podge or different decoupage medium
- Brush
- Scissors
- Elective: sandpaper
**Directions:**
- Put together the wooden floor. If the wooden floor is unfinished, you might have to sand it calmly to create a easy floor. Wipe away any mud or particles.
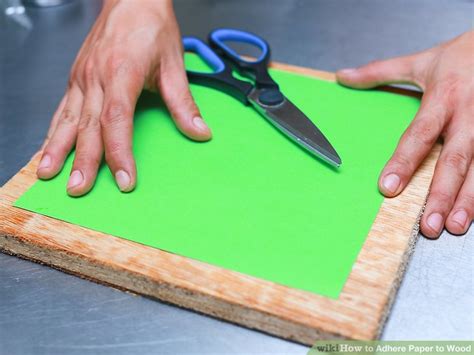
- Trim the picture. Reduce the picture to the specified measurement and form.
- Apply a skinny layer of Mod Podge to the wooden floor. Use a brush to use a fair layer, being cautious to not apply an excessive amount of.
- Place the picture on the wooden floor. Fastidiously align the picture and press it down firmly.
- Apply one other layer of Mod Podge to the picture. This can assist to seal the picture and defend it from moisture.
- Let dry. Permit the Mod Podge to dry utterly. This may increasingly take a number of hours or in a single day.
Individuals Additionally Ask
How do I defend the picture from yellowing?
To guard the picture from yellowing, you may apply a UV protectant spray after the Mod Podge has dried.
Can I adhere photographs to any kind of wooden?
Sure, you may adhere photographs to any kind of wooden. Nevertheless, some woods, comparable to pine, might require a primer to assist the Mod Podge adhere higher.
Can I exploit different supplies to stick photographs to wooden?
Sure, you should use different supplies, comparable to glue or varnish, to stick photographs to wooden. Nevertheless, Mod Podge is a well-liked alternative as a result of it’s simple to make use of and creates a robust bond.
